Umbraco
How to install Umbraco on your local computer

Umbraco is a versatile content management system (CMS), as flexible and scalable as more popular CMSs like WordPress. True, there’s a learning curve and it’ll require some perseverance, but on the plus side, you’ll be able to master an enterprise-grade CMS that can be shaped to seamlessly integrate with your business.
Getting started with the open-source CMS is perhaps not that well documented on the internet, but it isn’t that hard compared to other CMSs like WordPress or Joomla.
System Requirements
For this post, I fired up an old Dell i3 with 8GB RAM and an almost clean install of Windows 10 Home. According to the official Umbraco system requirements documentation, the requirements for local development are:
One of the following OSs:
- Microsoft Windows 10 (this tutorial) or 11
- MacOS High Sierra 10.13
- Linux (Ubuntu, Alpine, CentOS, Debian, Fedora, openSUSE and other major distributions)
One of the following .NET Tools or Editors:
- Visual Studio Code with the IISExpress extension
- Microsoft Visual Studio 2022 v17.4
- JetBrains Rider version 2022.3 and higher
- .NET Core CLI
.NET 7.0
SQL connection string (SQL Server)
Installing Umbraco
In the tutorial below I will also include steps for the installation of winget which you’ll need to install .Microsoft.DotNet.SDK.7. The .NET SDK is used for app development and contains the dotnet CLI. I’ve included steps to install the ASP.NET Core Runtime in case SDK installation doesn’t provide access to the dotnet CLI.
Step 1: Install .NET SDK (and ASP.NET Core Runtime)
Click on Start and open up Microsoft Store. Search for App Installer which contains the winget CLI feature.
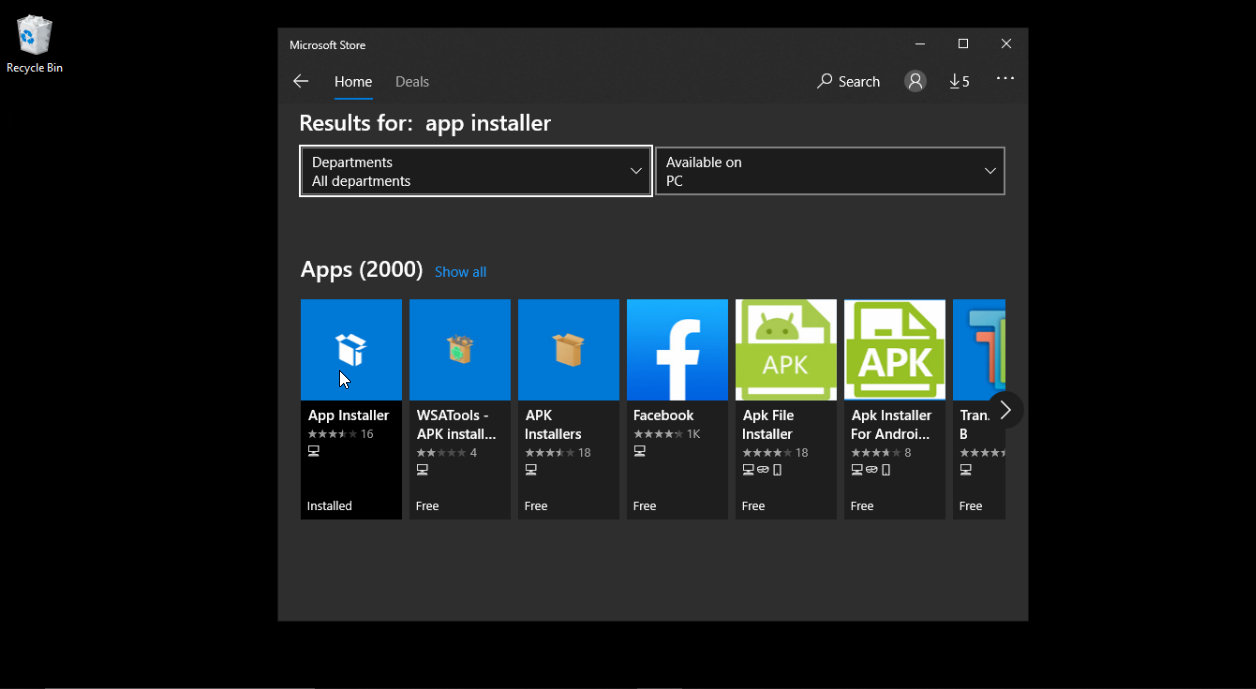
Once you click on the App Installer installation should start. If it doesn’t, just click Get.
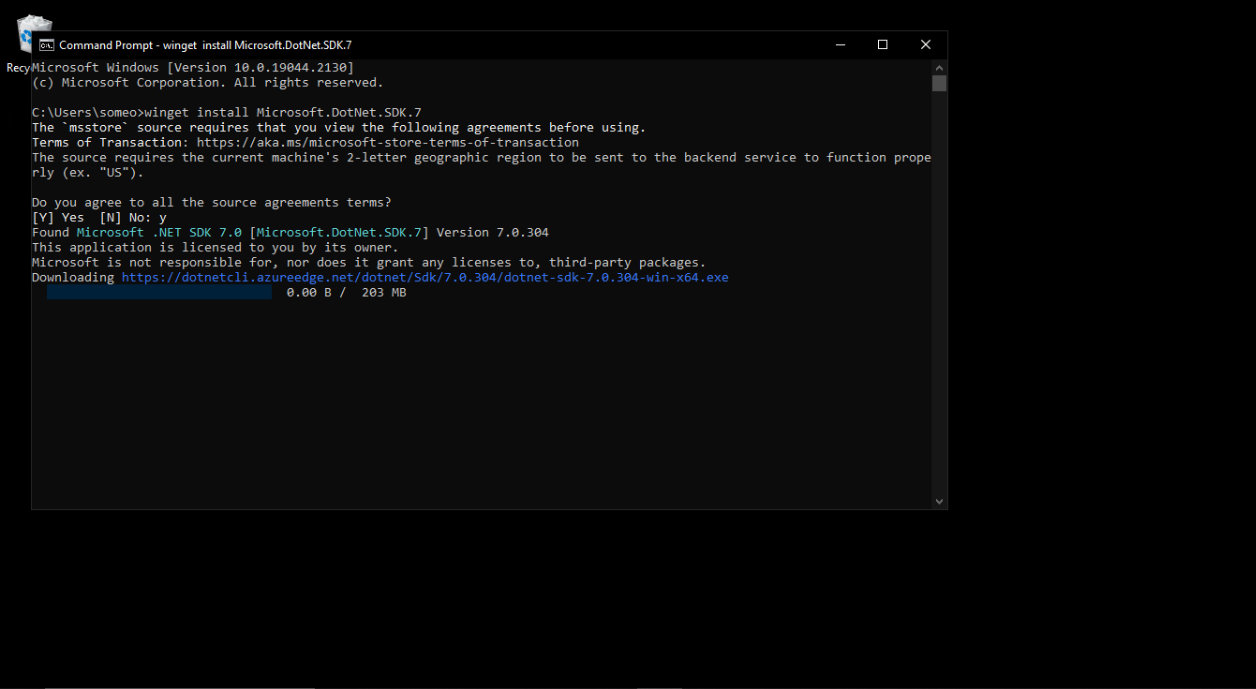
With the App Installer installed, click on Start and search for Command Prompt.
With Command Prompt open, type in the following command and press enter:
winget install Microsoft.DotNet.SDK.7
Although you won’t be prompted to restart your computer, restarting once the installation is complete might be necessary to get access to the dotnet CLI tool.
Once your computer has restarted, open Command Prompt again and type in:
dotnet –version
If dotnet CLI has been installed, the output of the above command should be the version number, for example, “7.0.304”.
Step 2: Install Umbraco
Now that we have installed dotnet CLI, installing Umbraco can be done with three easy lines of code.
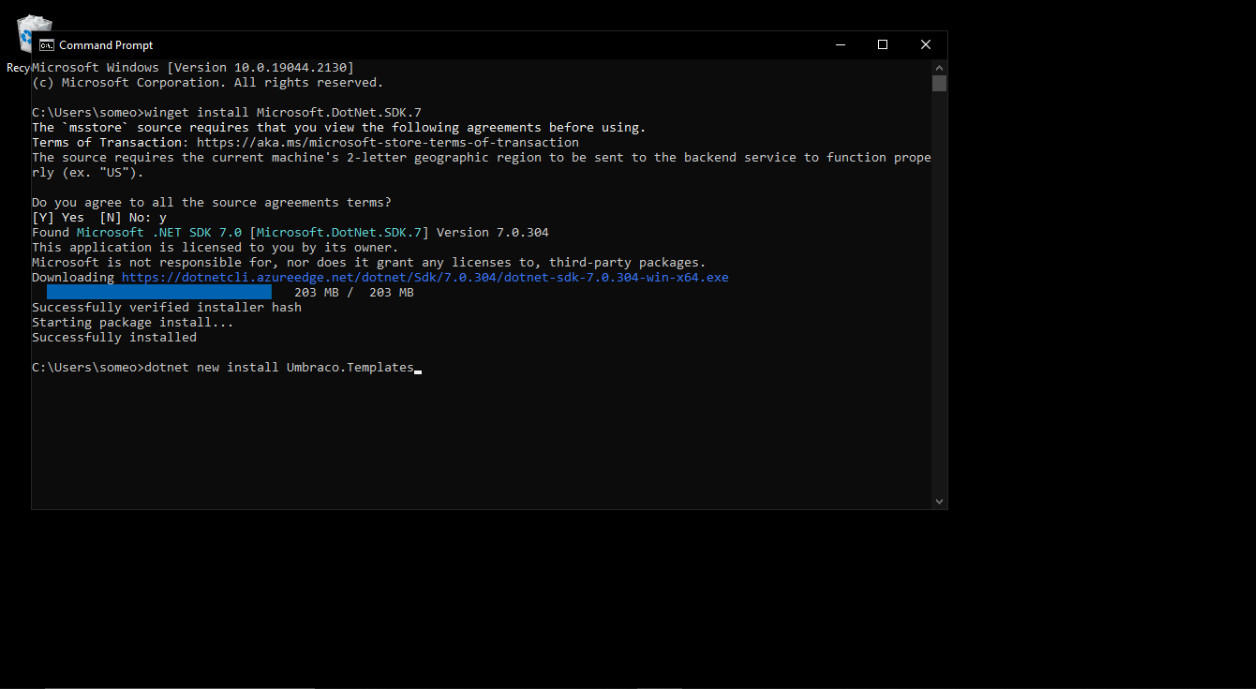
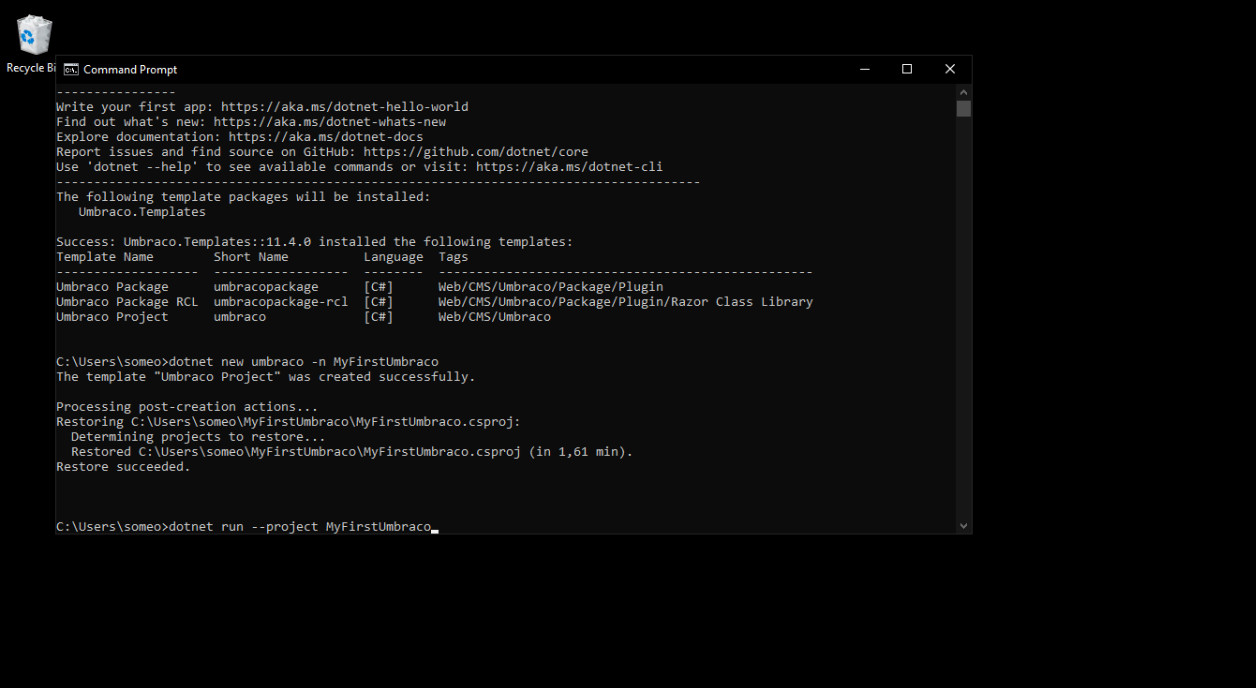
First, let’s install Umbraco Templates. With the Command Prompt app still open, type in the following and press enter:
dotnet new install Umbraco.Templates
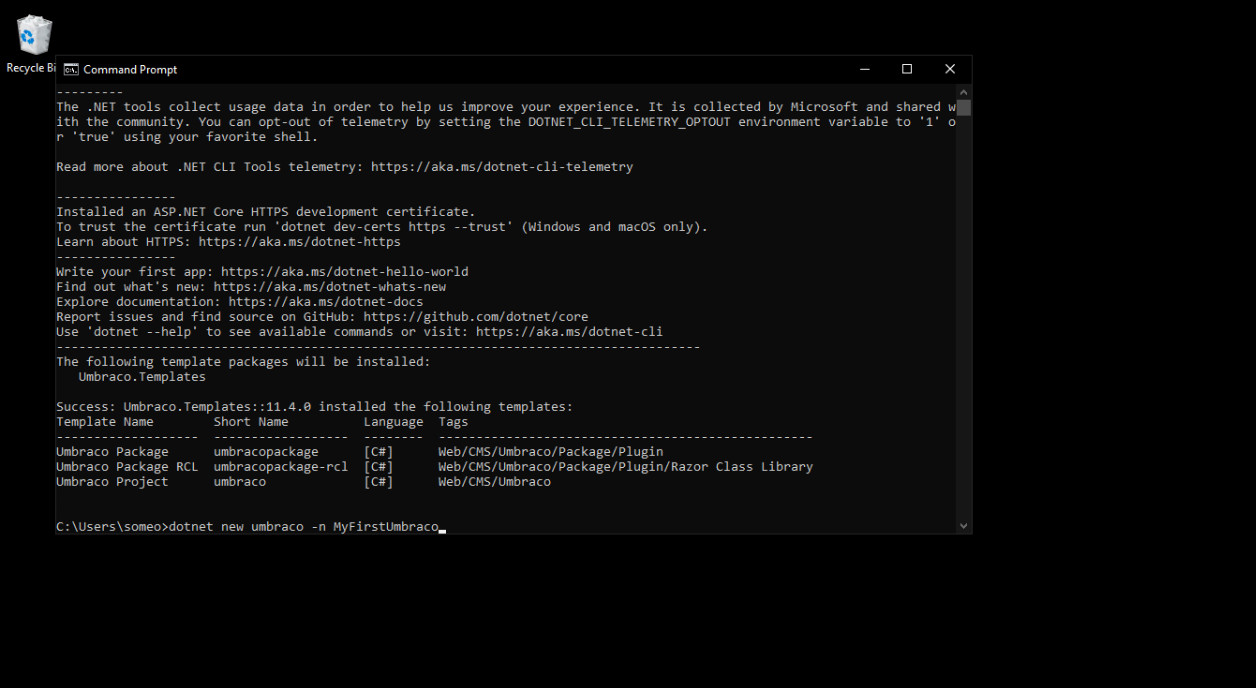
This will Install:
- Umbraco Package
- Umbraco RCL (Razor Class Library)
- Umbraco Project
Then, run the following command to create your Umbraco project. I called the project ‘MyFirstUmbraco’, but you’re free to change the name to one of your choice.
dotnet new umbraco -n MyFirstUmbraco
As a final step, we need to run the Umbraco project just created. This can be done with the following command – which should be run every time you wish to access your Umbraco project:
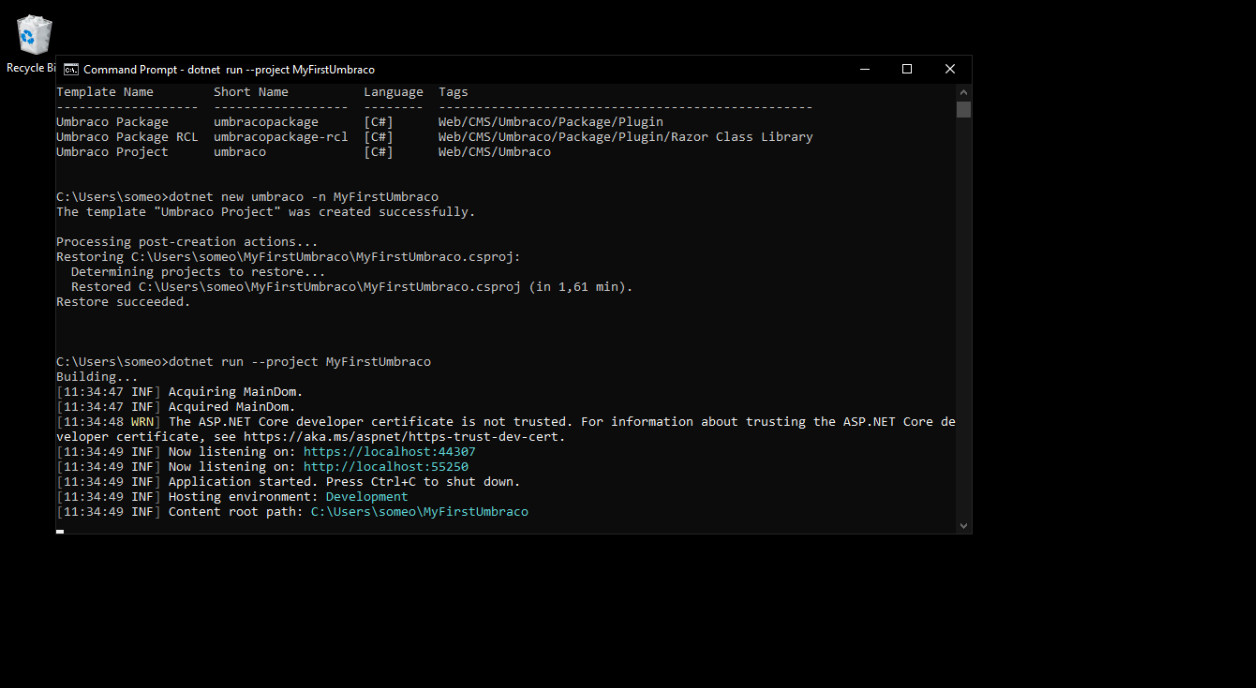
dotnet run --project MyFirstUmbraco
This should output runtime information into the Command Prompt window. Importantly, it provides the addresses we need to access Umbraco. In my case, these are:
https://localhost:44307
or
http://localhost:55250
The output in Command Prompt also provides information about the hosting environment, which is local or ‘Development’ – perfectly fine, since we’ll be using this site to explore Umbraco. You’ll also see the ‘Content root path’, which is where all our project files are stored. In my case, it’s C:\Users\someo\MyFirstUmbraco.
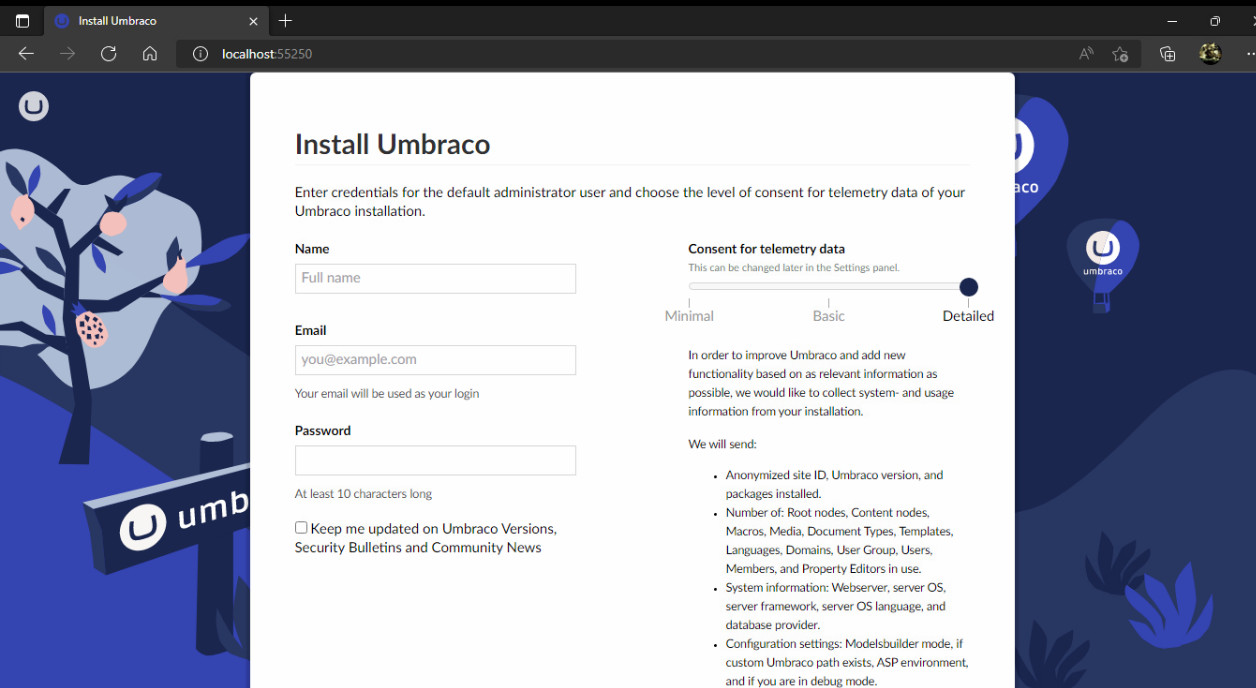
You can now open a browser and access Umbraco. Since I don’t have an SSL certificate installed on my local computer, I’ll use the http address provided: http://localhost:55250
Next Steps
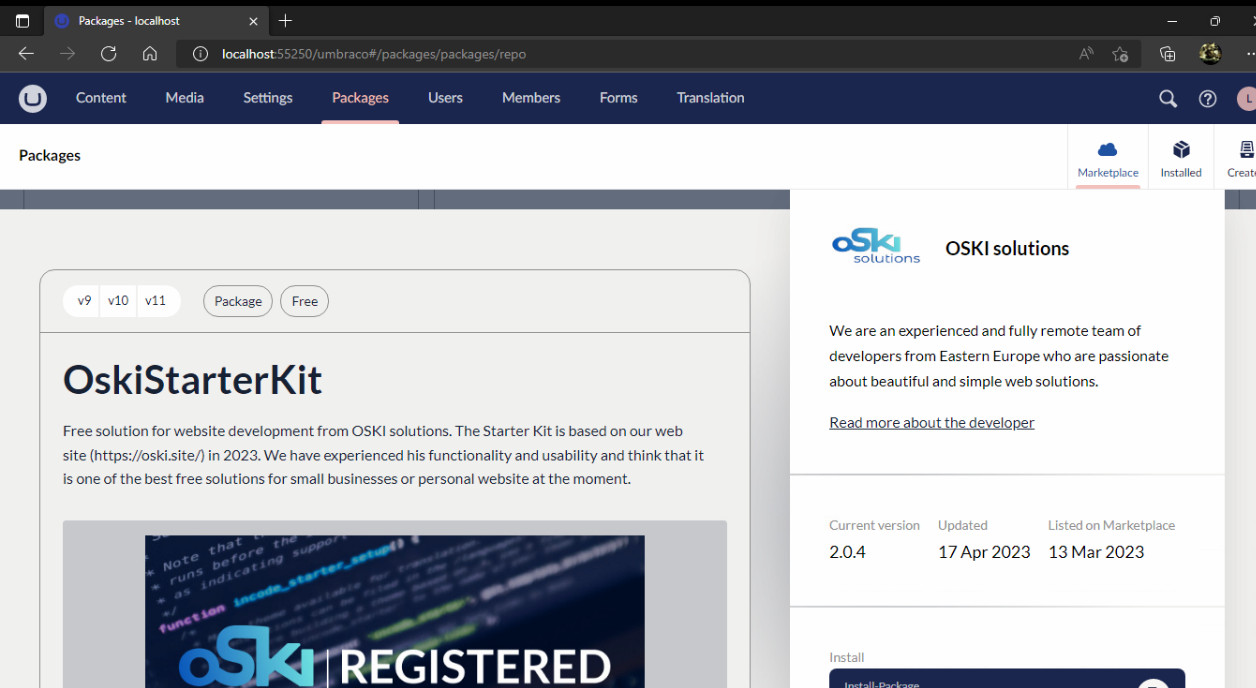
With Umbraco installed, you can run through the guided tour, which is always available by clicking the question mark in the top right corner of the Umbraco backoffice. Once you’re done, you can head over to Packages in the top horizontal menu. Here you’ll find a collection of addons for Umbraco. These are the equivalent of themes and plugins in WordPress.
To get things up and running quickly, head over to Themes & Starter Kits which, as the name suggests, provides access to templates that can make it a little easier to get started with Umbraco.
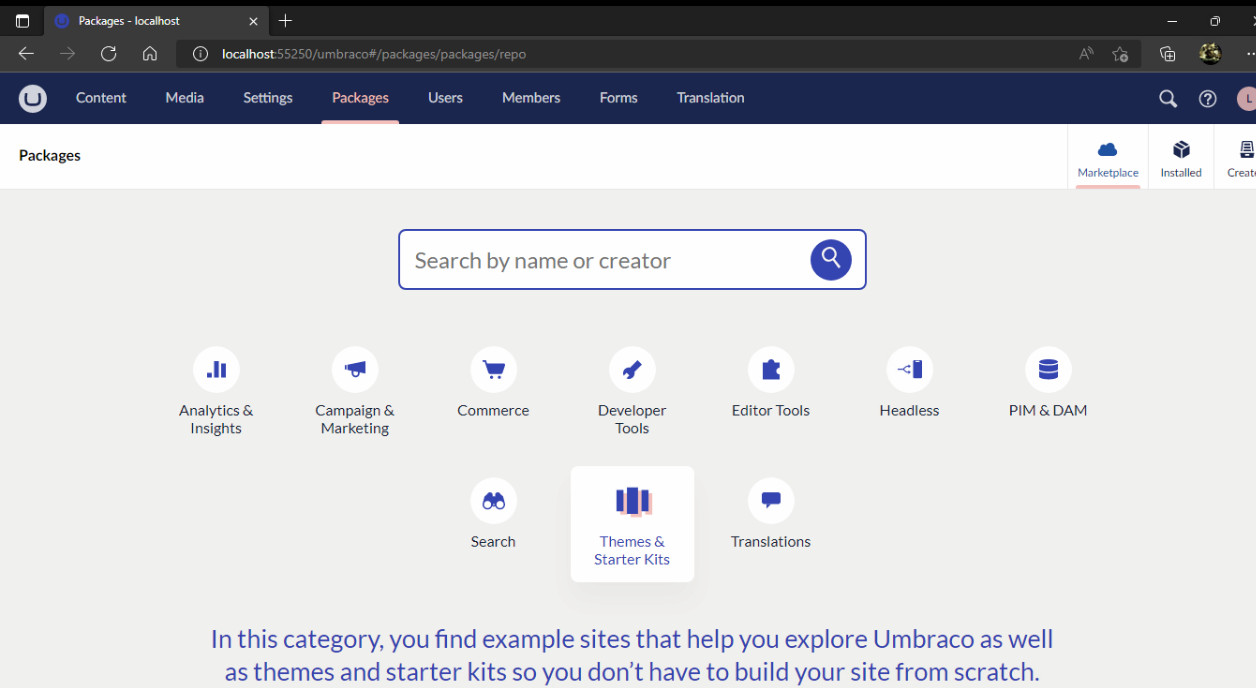
Once you’ve clicked on Themes & Starter Kits scroll down to view the list of available packages. Take note that some are commercial, while others are free. For this installation, I used the free OskiStarterKit, which is a kit based on the OSKI solutions website.
On each package’s page, you’ll see two buttons to install the package. These buttons simply copy the installation command needed to install the package. For this tutorial, I clicked on the dotnet add package button, and pasted the command (dotnet add package OskiStarterKit) into a text editor.
To install an Umbraco package into the project we just created, the easiest way is to quit your running Umbraco project in the Command Prompt window with CTRL+C. Then change directory to your Umbraco project’s content root path as displayed when you run your project.
For me, that command will be cd c:\Users\someo\MyFirstUmbraco. Once you are in your project directory, run the package installation command:
dotnet add package <package-name>
For example: dotnet add package OskiStarterKit
Once the package has been installed, you need to build the package with:
dotnet build
When that’s done, run your Umbraco project again as you did previously. For me, that command is:
dotnet run --project MyFirstUmbraco
When you open your browser to access your Umbraco project, you’ll note that the front page of your site has been replaced by the Oski website template.
To access the Umbraco backoffice, you need to append /umbraco to the URL – http://localhost:55250/umbraco in my case.
And that’s all there is to it. You can now start customising the Oski template to familiarise yourself with Umbraco.
More related news

Cloud Hosting
Cloud Server vs VPS: What’s the Difference and Which Is Better for Your Business?
If you’re running a SaaS platform, digital agency, ecommerce store, education portal,...
Developers
Low-code + custom: when to use low-code tools in your SaaS stack (and when not to)
Low-code has become a practical part of many SaaS stacks – because...

SaaS
Managing Unplanned Growth: Autoscaling & Cost Controls for Burst Traffic
When growth arrives unannounced – viral link, investor announcement, seasonal rush –...
Speak with a Storm Expert
Please leave us your details and we'll be in touch shortly
A Trusted Partner