Backups & Disaster Recovery
Website Migration: How to Move Your Site to a New Host or Platform

Moving your site to a new host or platform is an easy process. Depending on your new host, you may not even have to lift a finger – all could be done for you while you get on with more important things, like running your business. In this post you’ll learn the easy 4-step process to move your site to a new host.
The easy way: let your new host take care of migration
If your new host is worth their salt, they’ve probably included migration in your hosting package. At Storm, for example, free migration from your current host to Storm is included when you sign up.
All that’s required here is that you provide the login credentials to your current host which your new host will use to complete the following steps:
- Create and download a backup of your hosting data. This includes all your website files and database(s).
- Your site files and database(s) are then uploaded to your new host.
- Your site’s functionality is tested
- Your domain’s DNS is updated to point to your new host.
Keep in mind that hosts will often use migration software that synchronises the source and destination right up until DNS changes take effect. This approach typically eliminates downtime and data loss since your site will be ready to hit the ground running once DNS changes are complete.
DIY website migration using cPanel
If you’re planning to migrate your website yourself, we recommend communicating the upcoming migration with your visitors. Many website owners use this opportunity to communicate the benefits of the migration (e.g. faster page load speeds, improved security, etc.) to their audiences. Alternatively, a simple “Scheduled Maintenance” message will do the trick.
When that’s done, the migration can begin.
Step 1: Export your website files from your current host
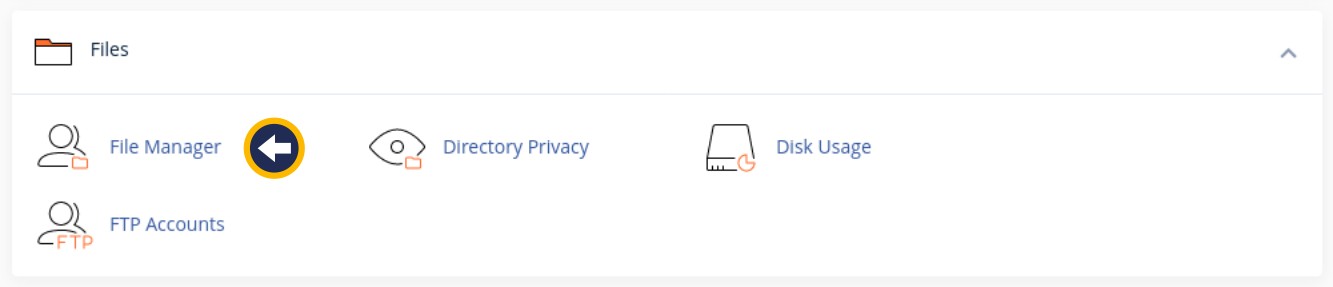
Log into cPanel and navigate to File Manager.
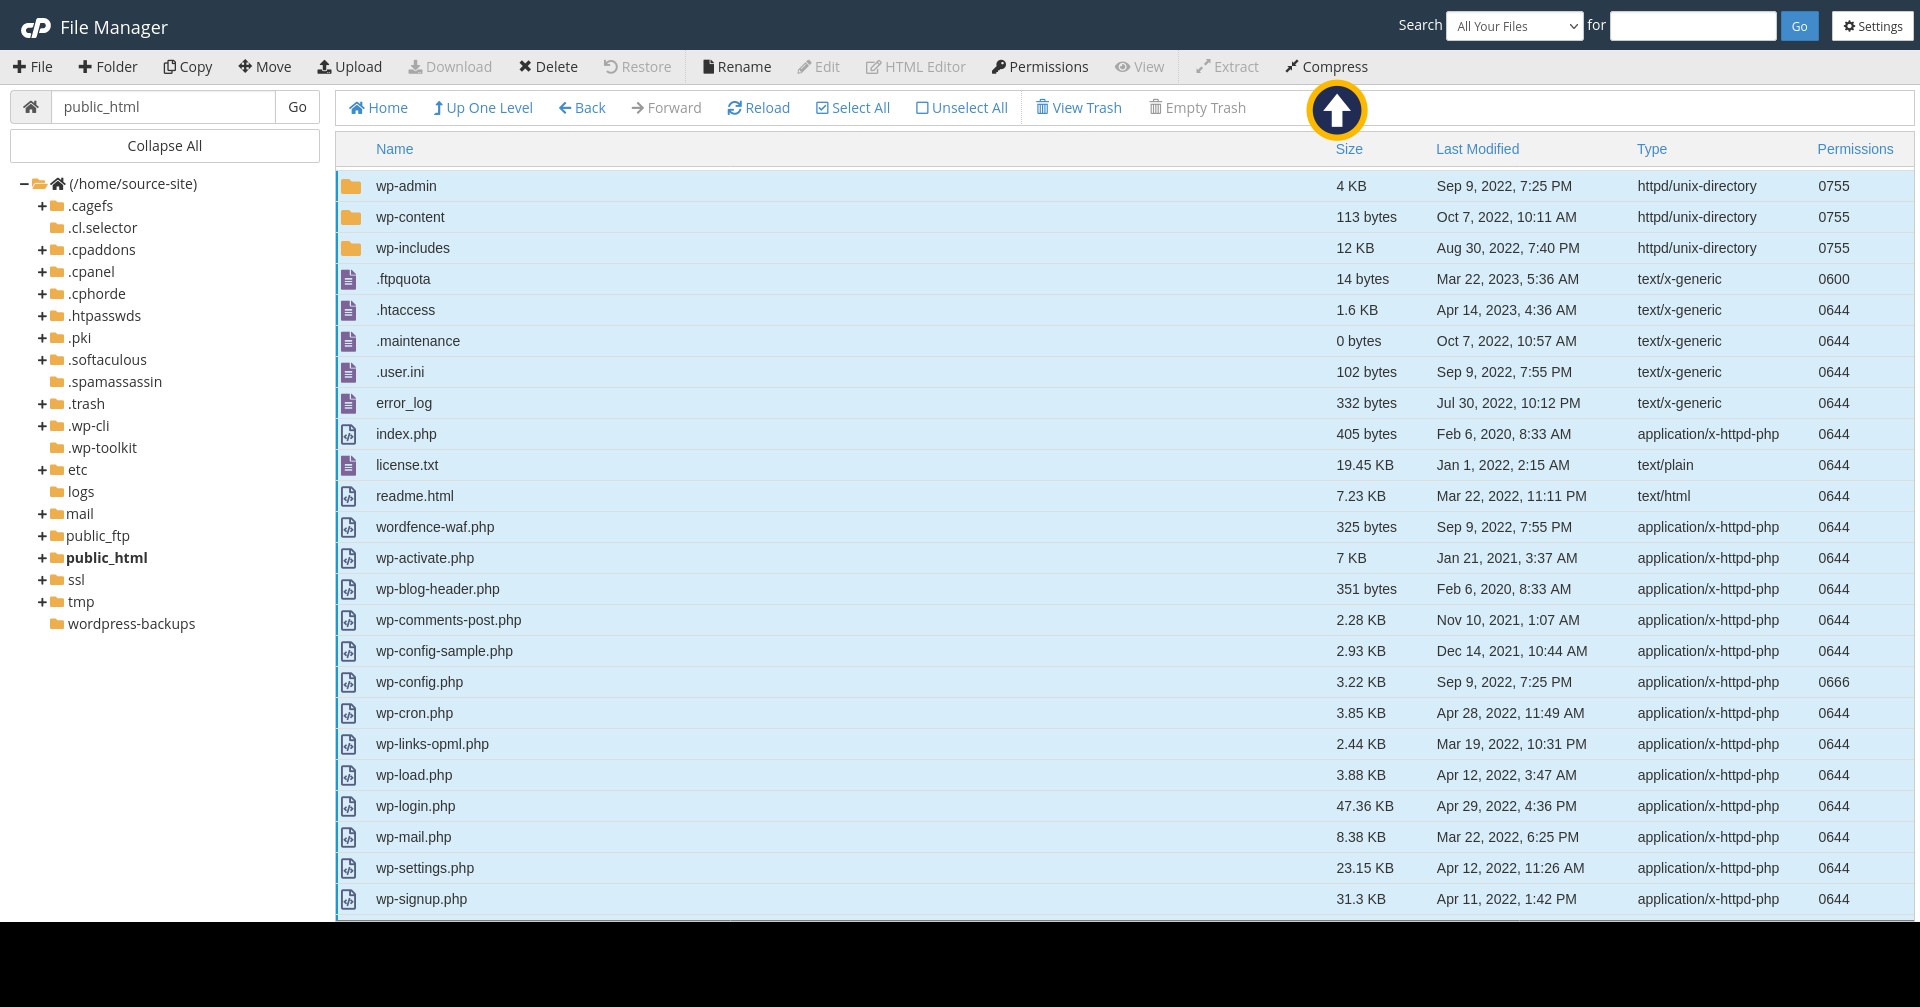
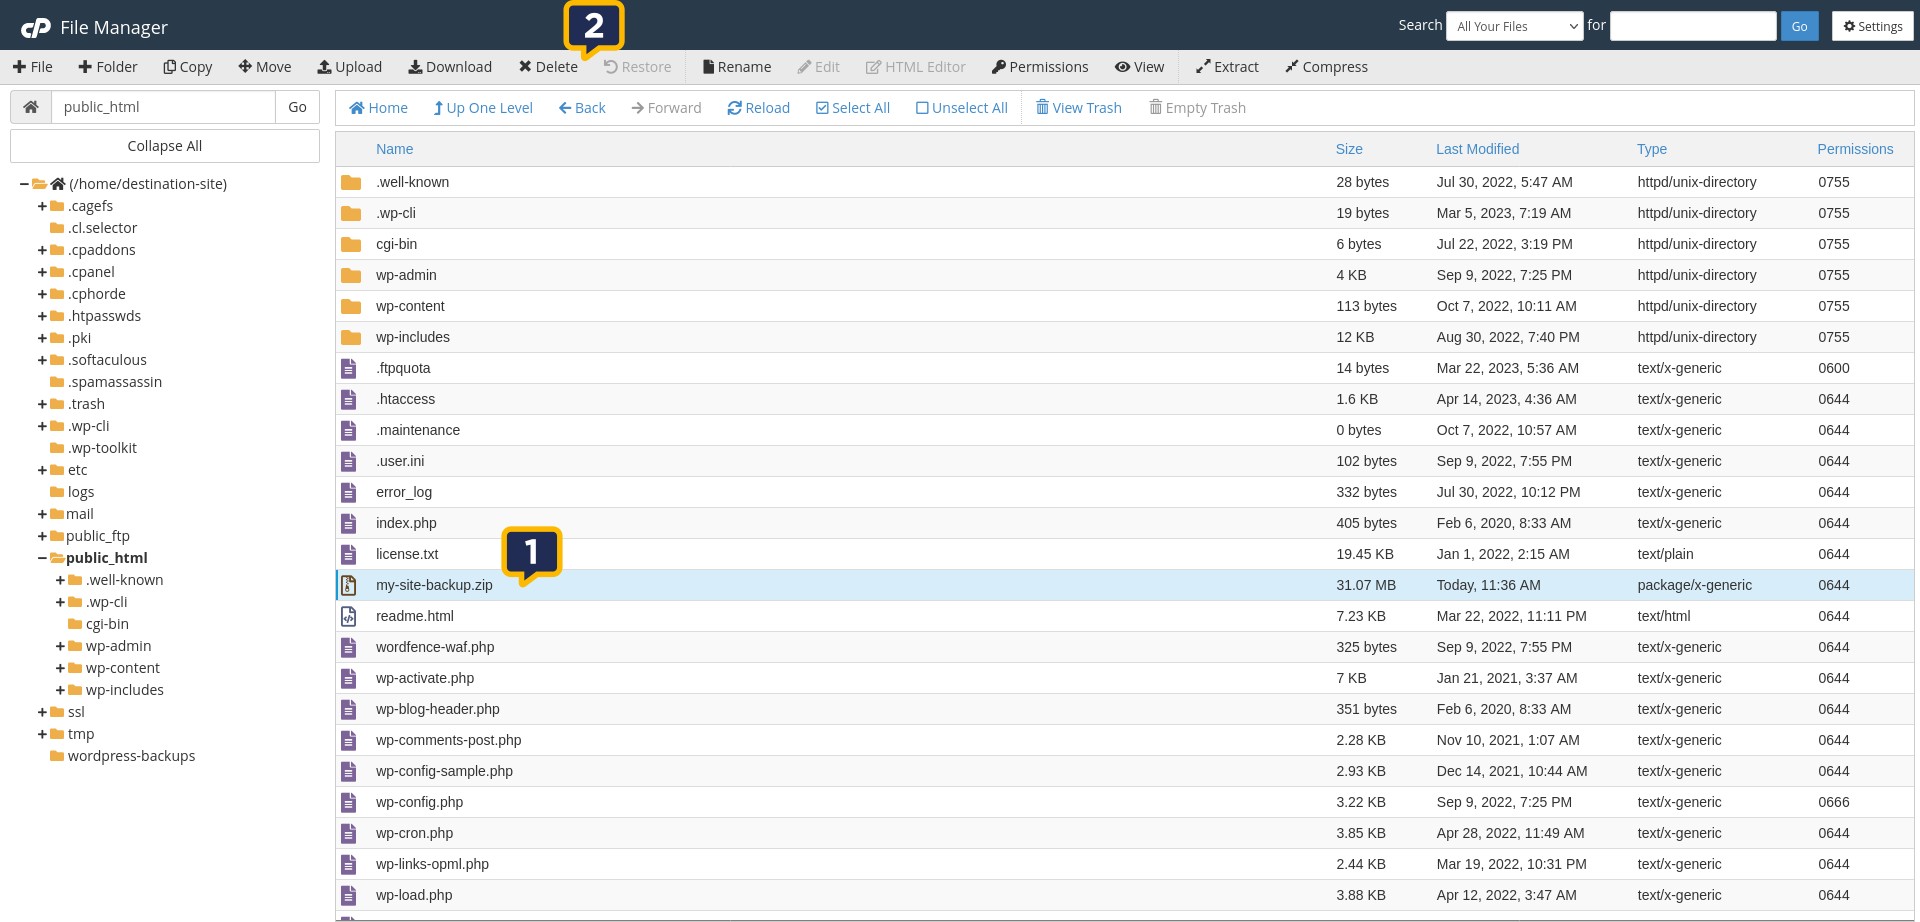
When you’re in the File Manager window, open up your public_html folder.
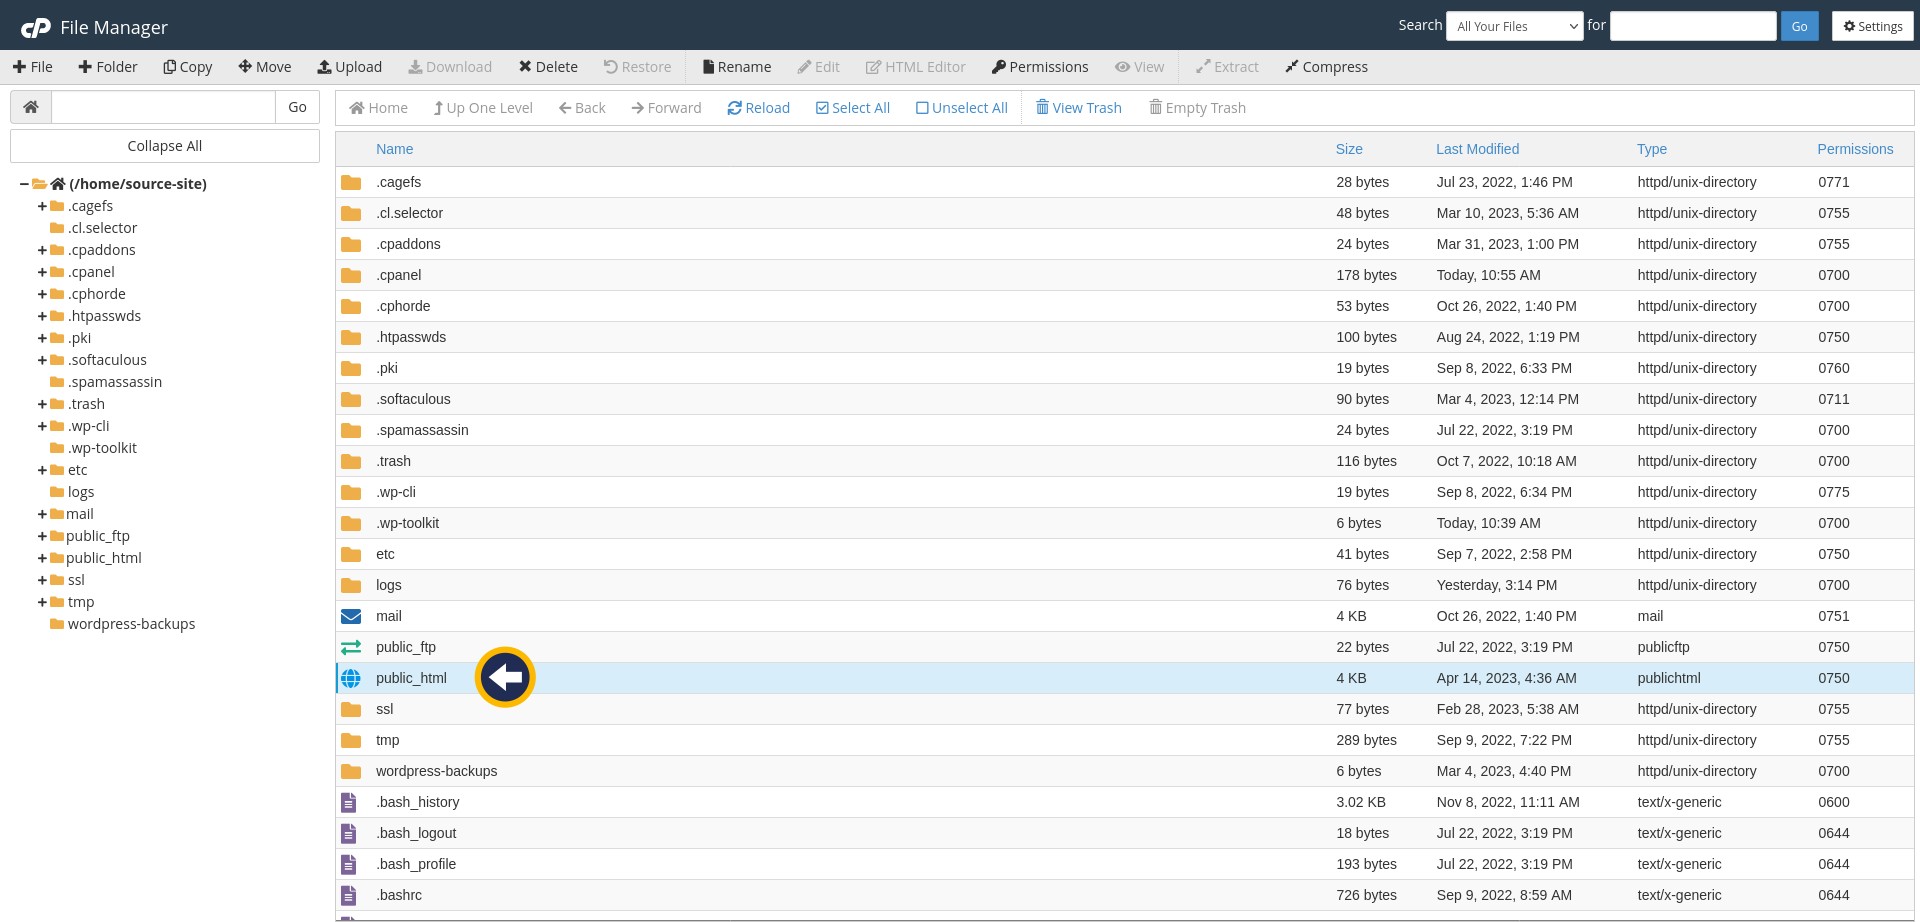
Select all your site files and folders. In this case, I’m using a WordPress website which means I selected all the WordPress files and folders. Then click on Compress in the top horizontal menu.
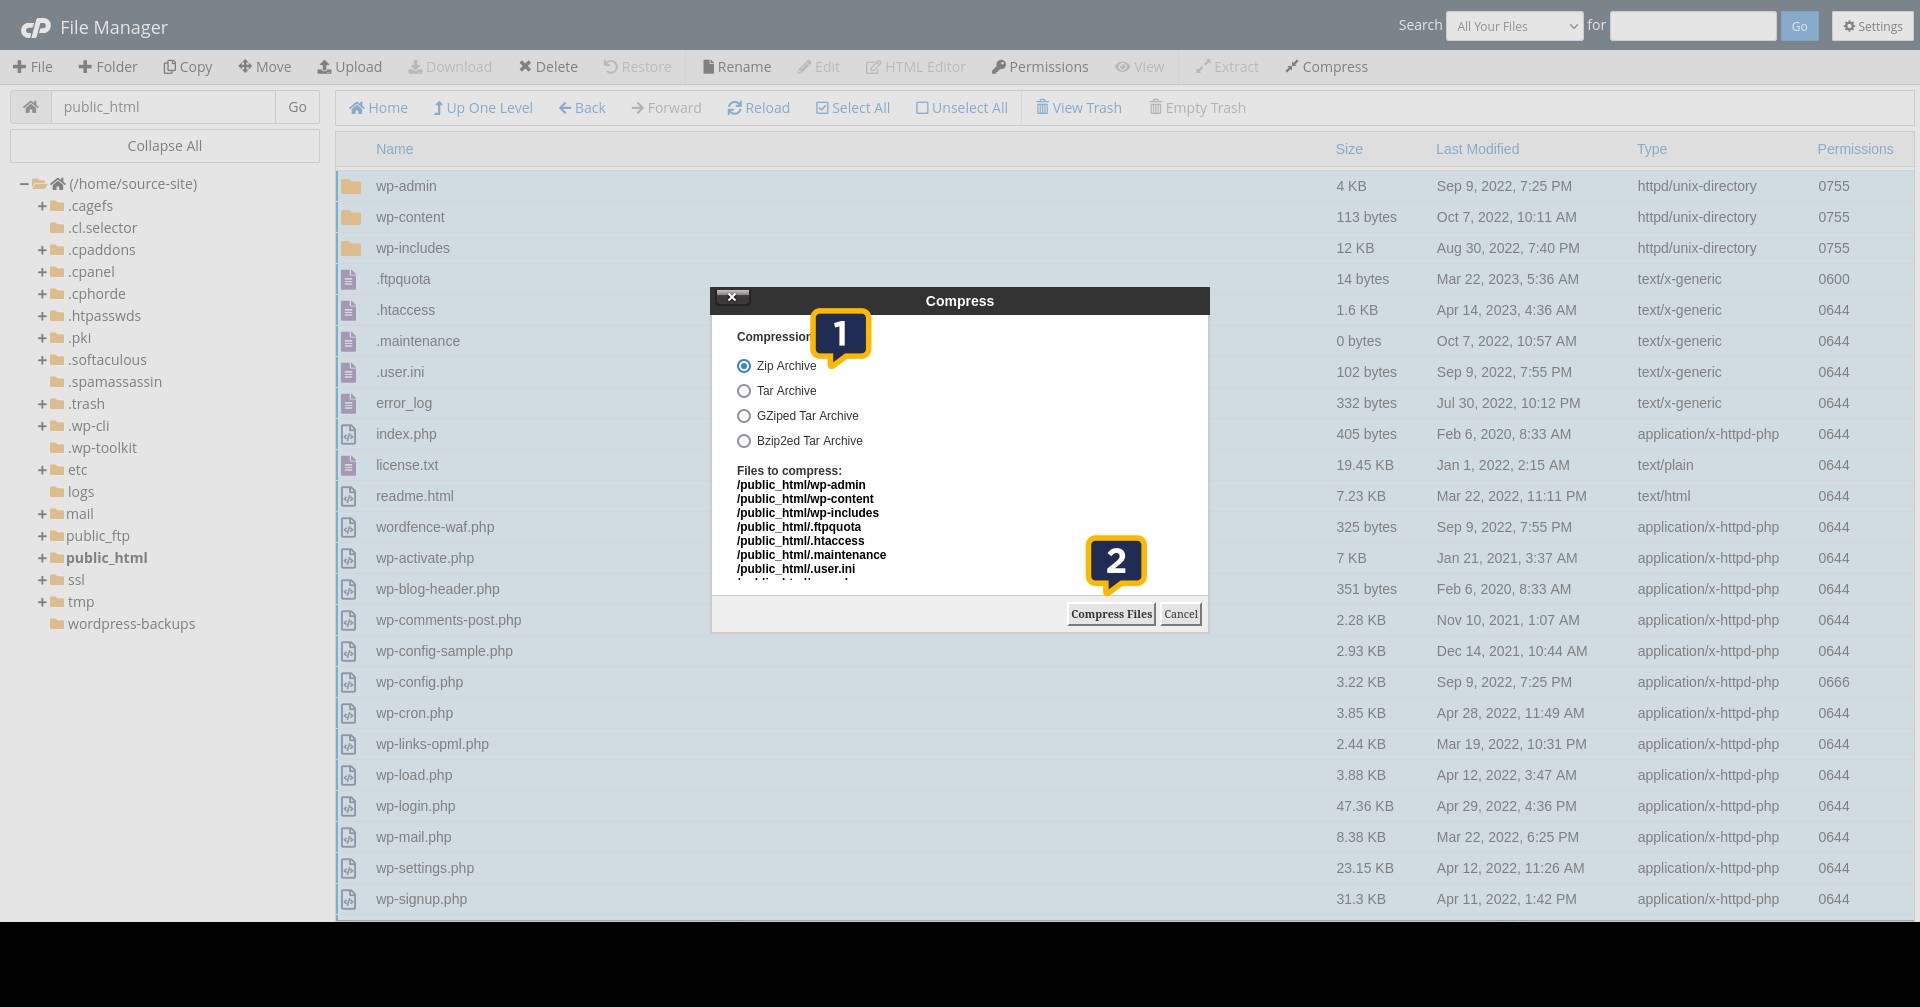
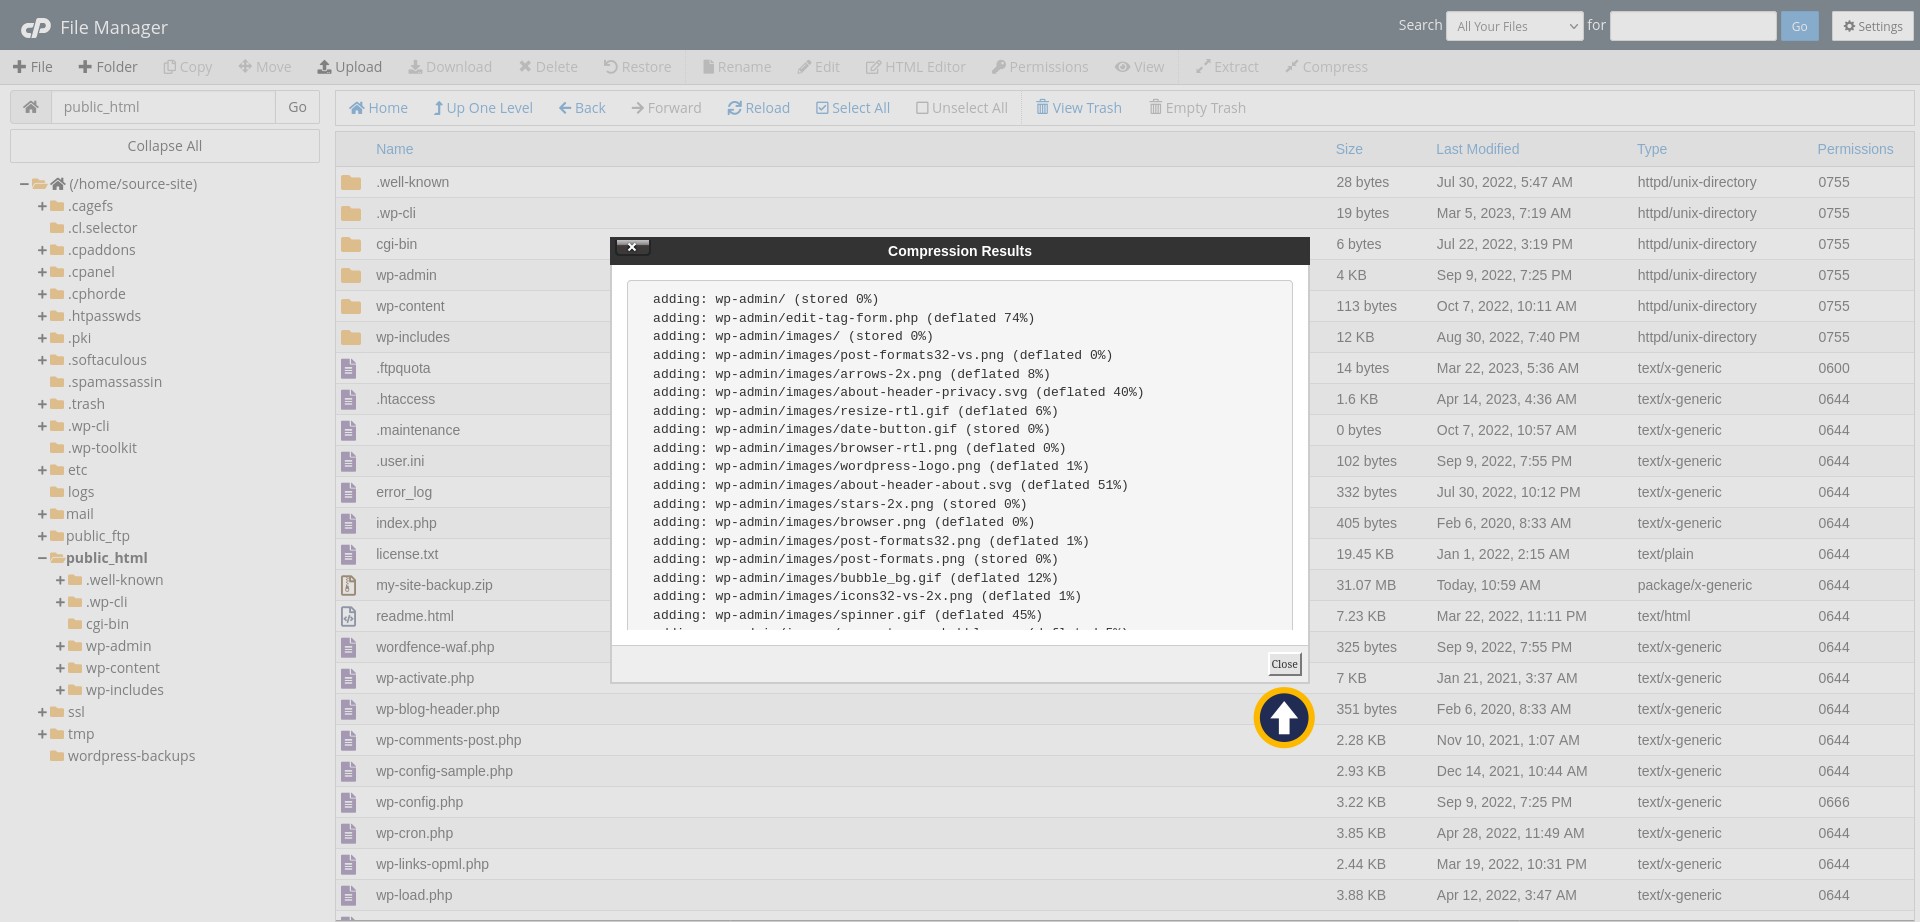
Select a compression type (e.g. Zip archive). At the bottom of the pop-up window you can optionally change the name of the compressed archive file. When you’re done, click Compress Files.
Once compression is done click Close on the Compression Results window.
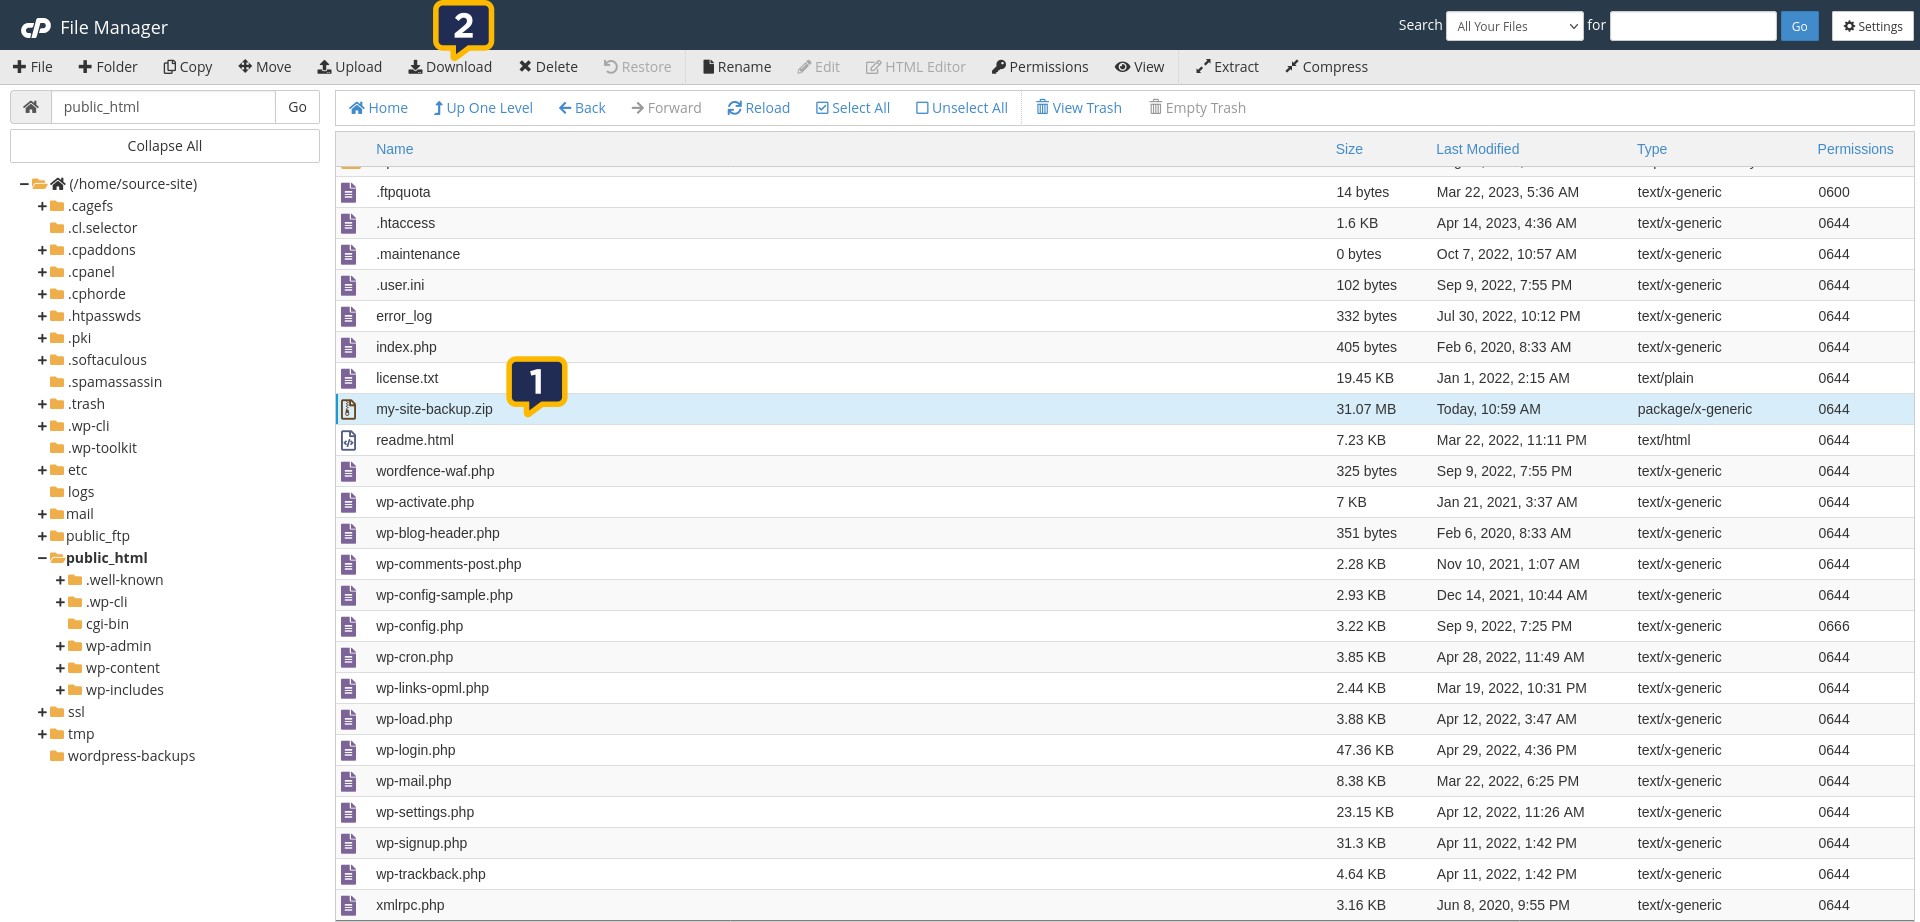
Your compressed file will now be listed in your site’s public_html folder. Click on it once, and then click Download in the top horizontal menu.
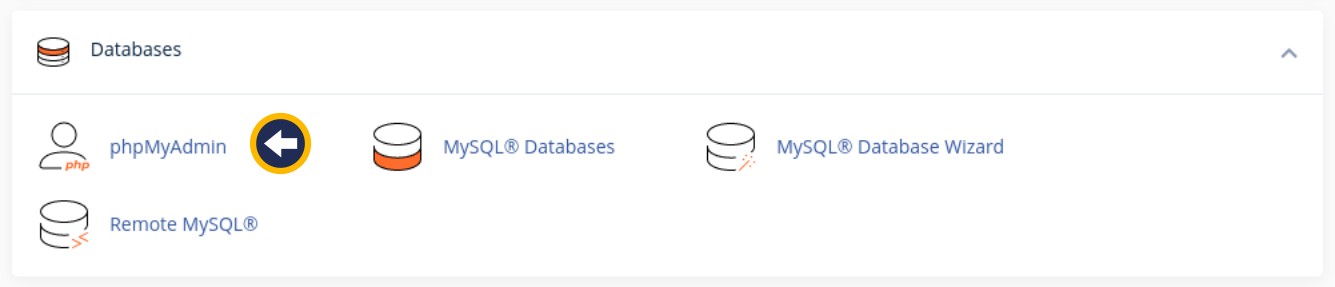
Next, navigate back to your cPanel dashboard and open up phpMyAdmin.
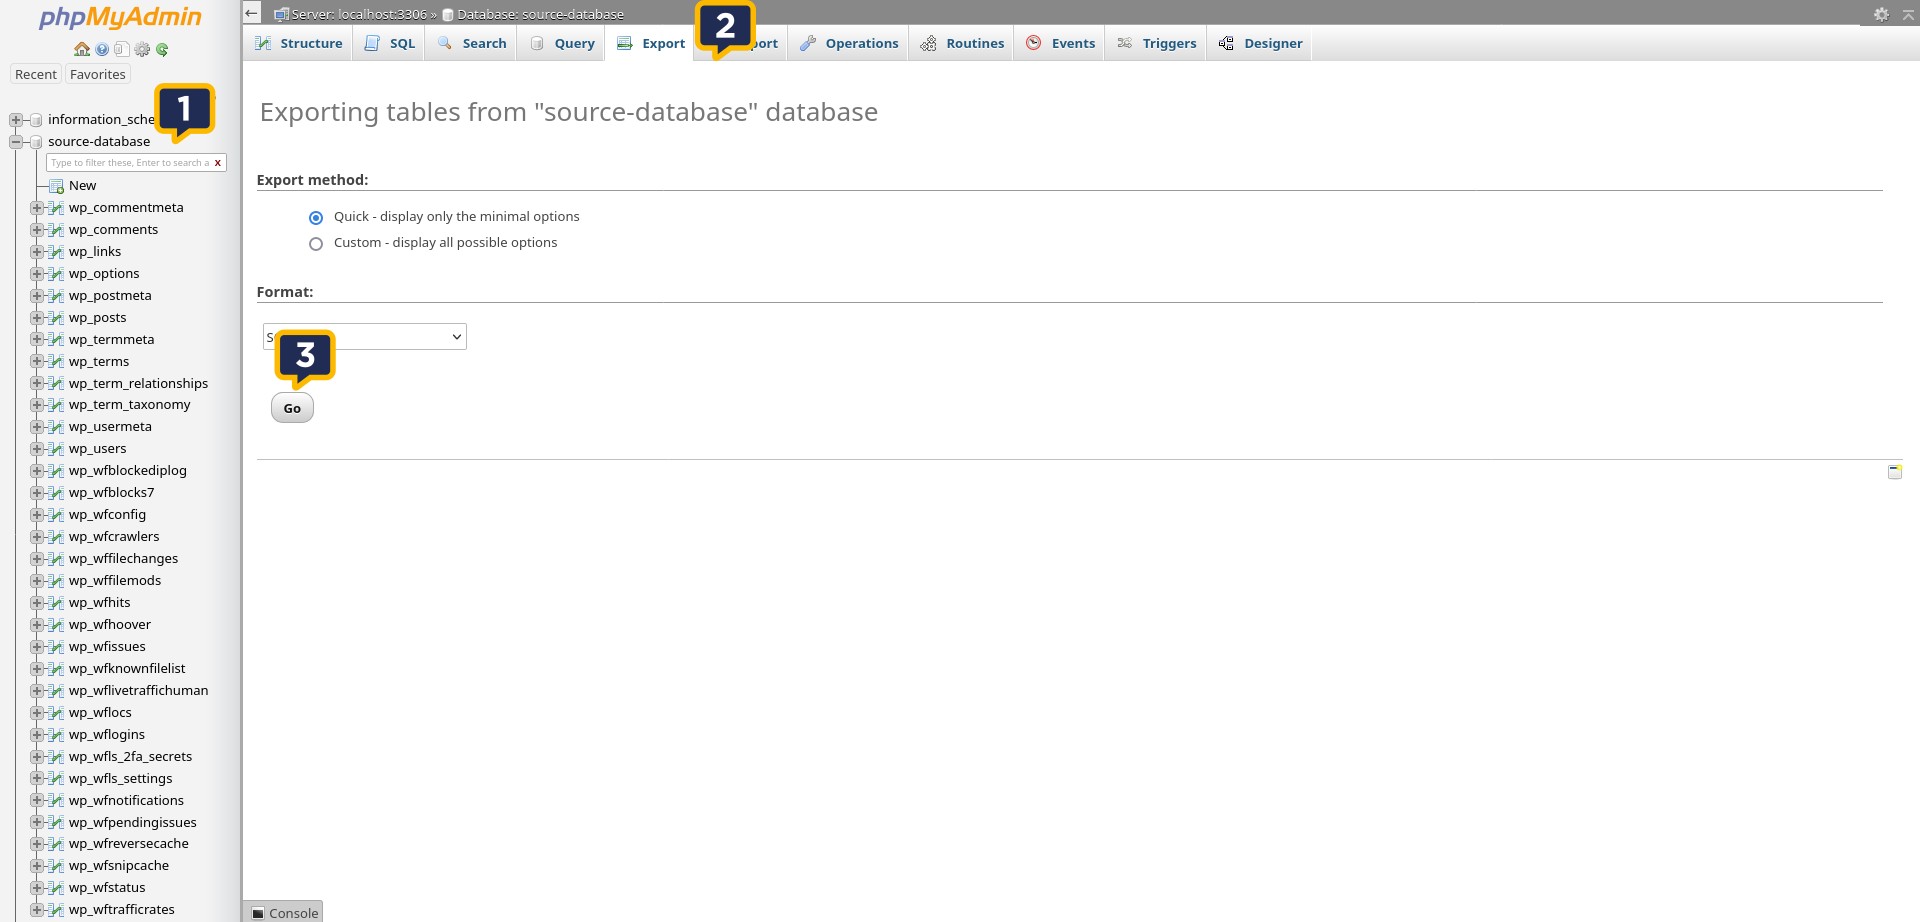
With phpMyAdmin open, select your site’s database name in the left-hand pane. Then click on Export. Leave all settings as they are, and click Go.
Step 2: Import your website files to your new host
The process for restoring your site files and database is essentially a reverse of the process we’ve just completed. The only exception is that I created a database on the new host’s server in which to import my WordPress database.
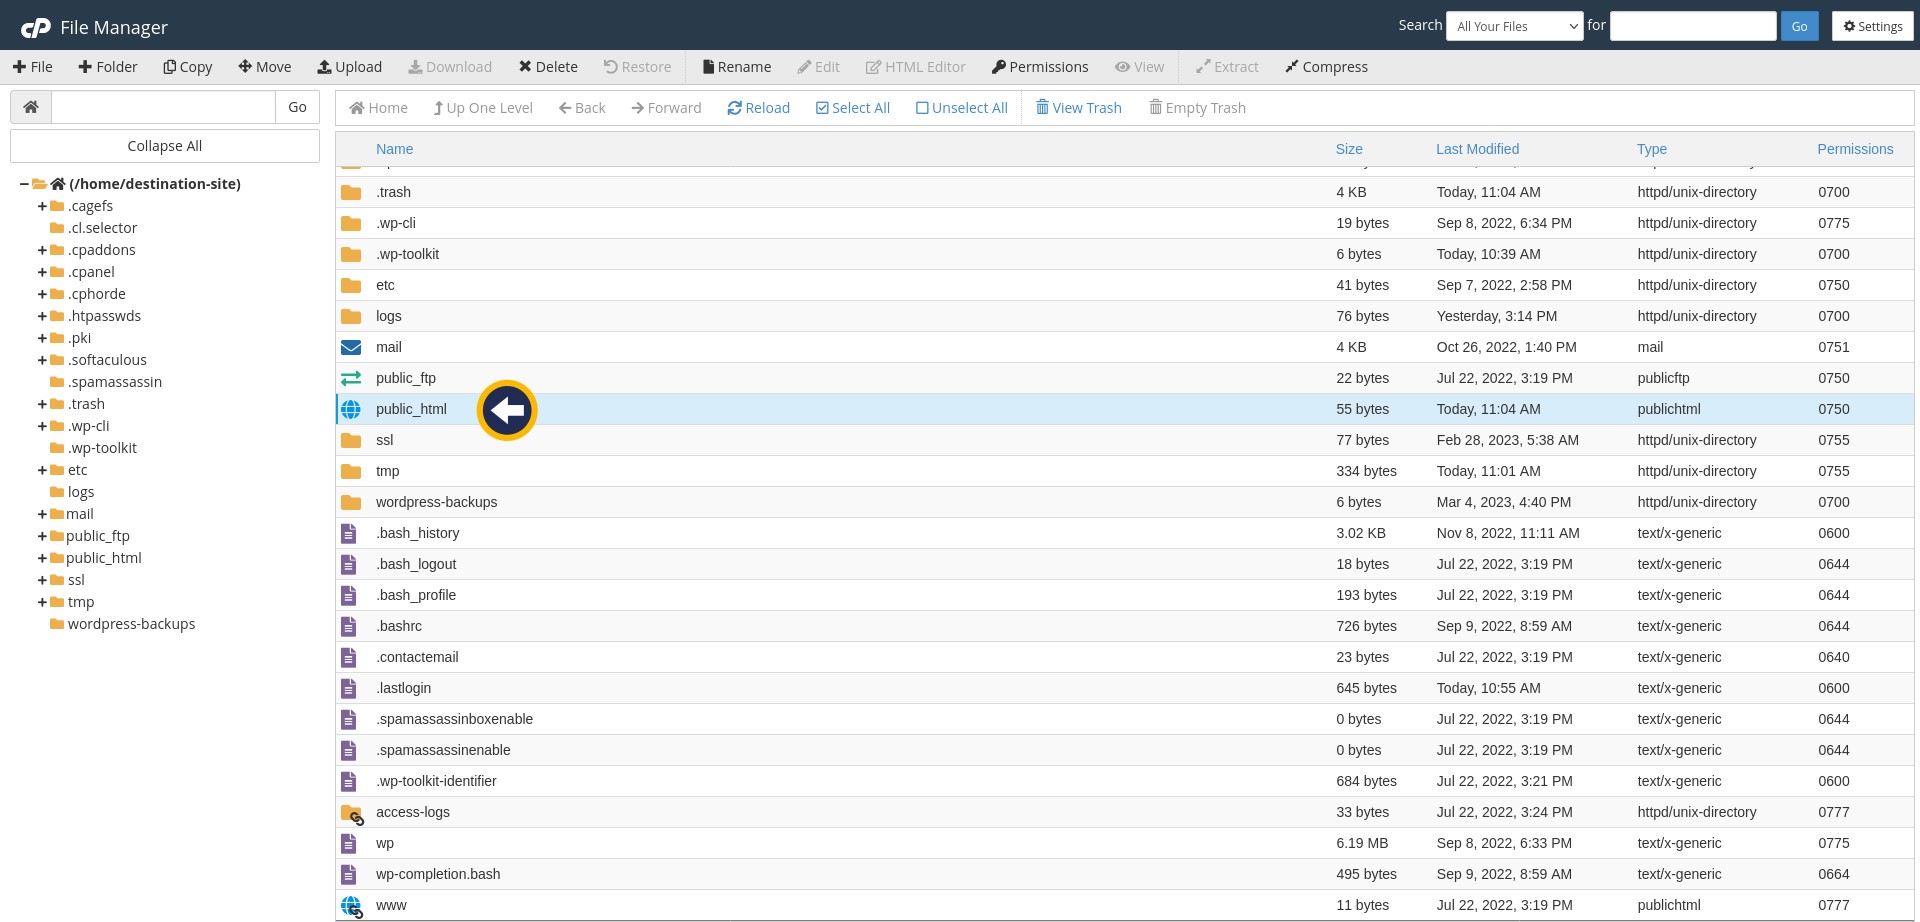
Start by logging into your new hosting account’s cPanel dashboard, then open up File Manager.
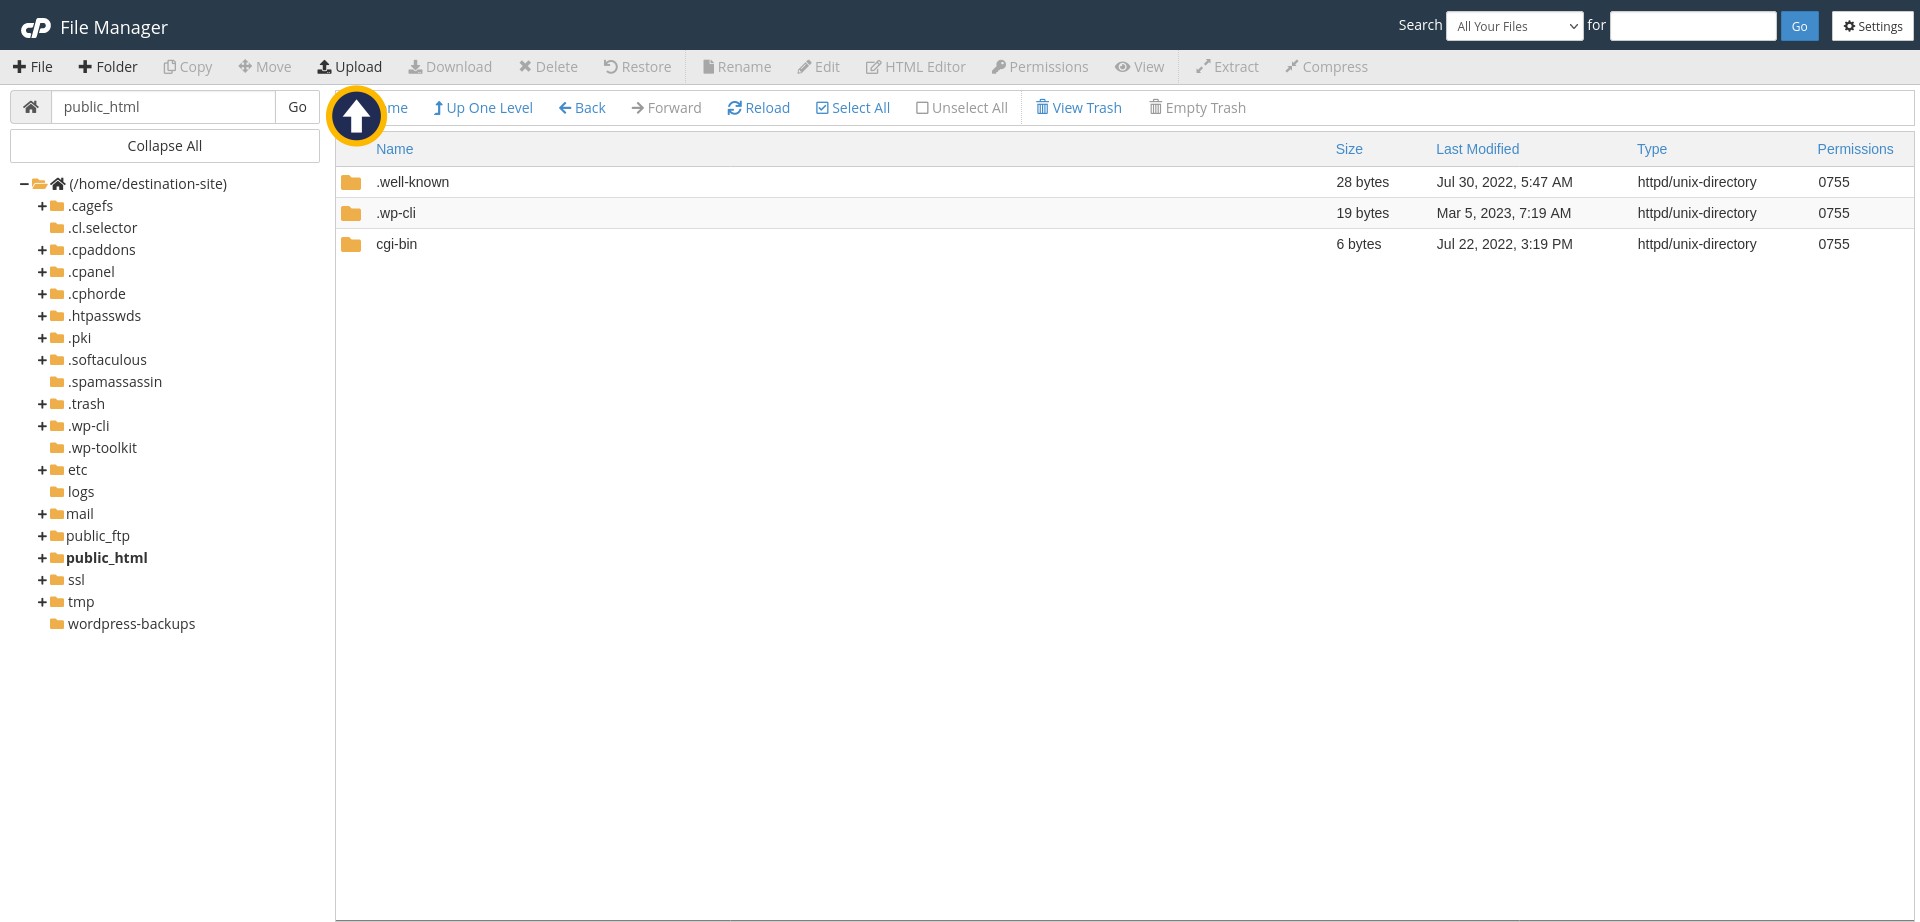
Open the public_html folder by double-clicking on it.
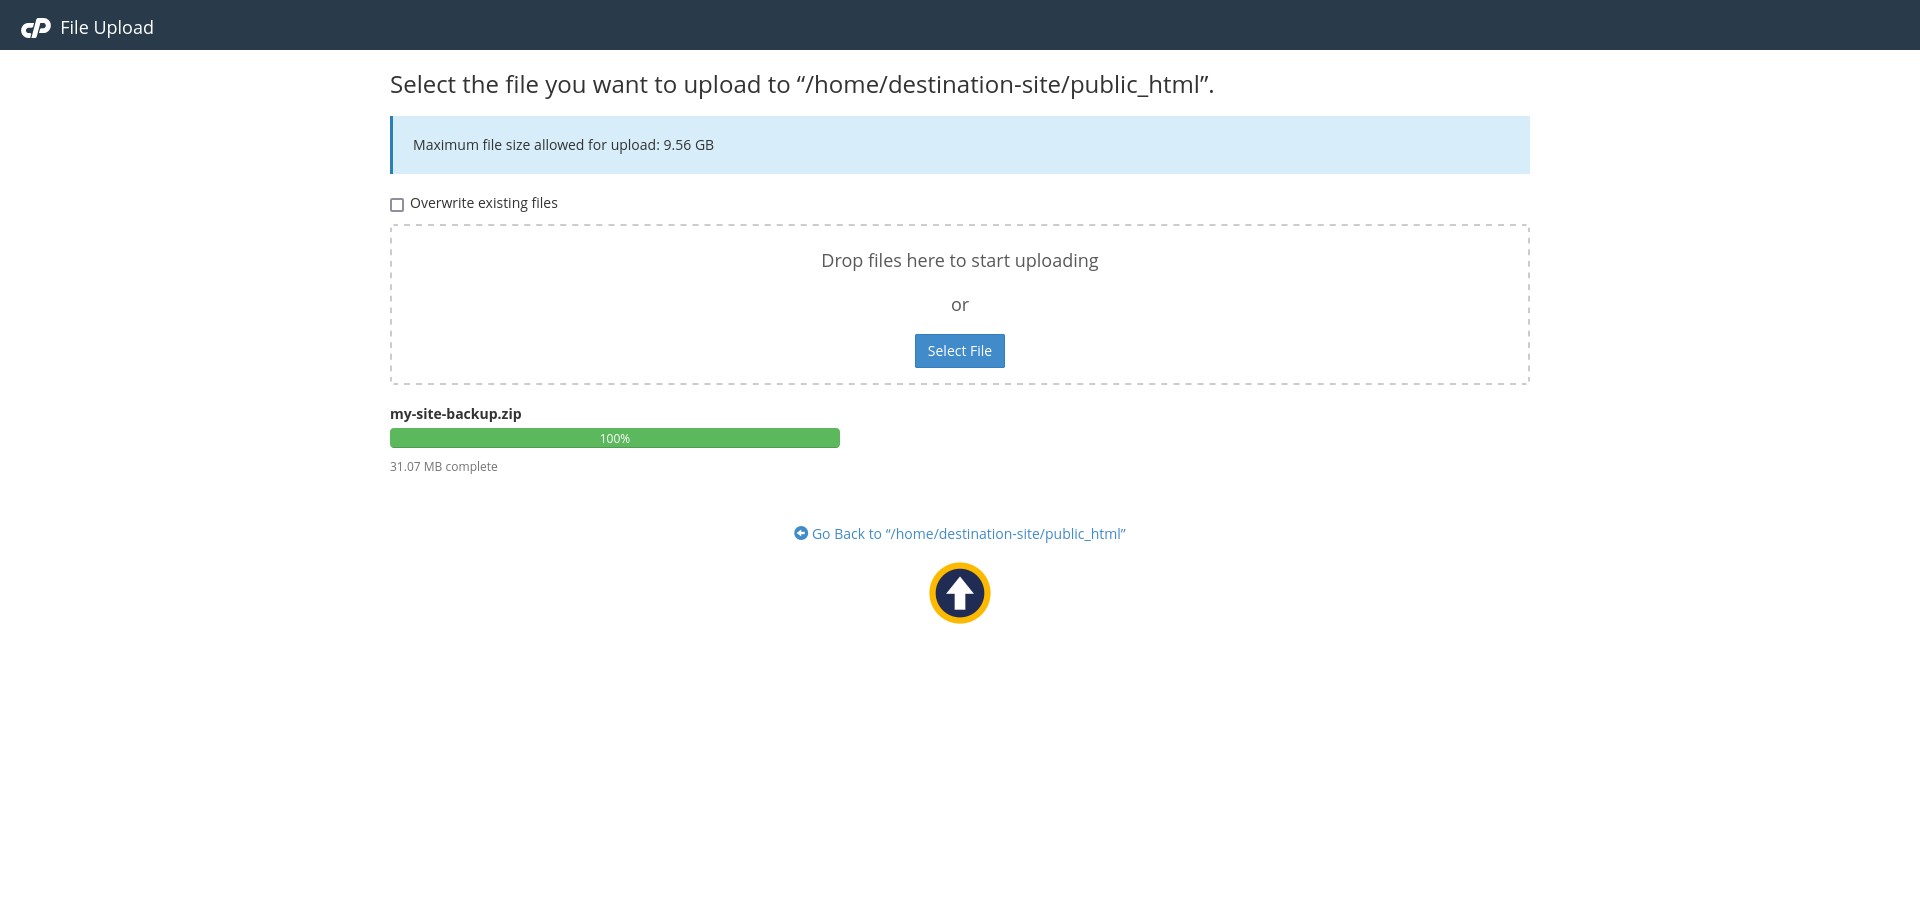
Select Upload from the top horizontal menu. A new tab will open up with a space where you can upload the compressed ZIP file you previously downloaded. Go through the upload process.
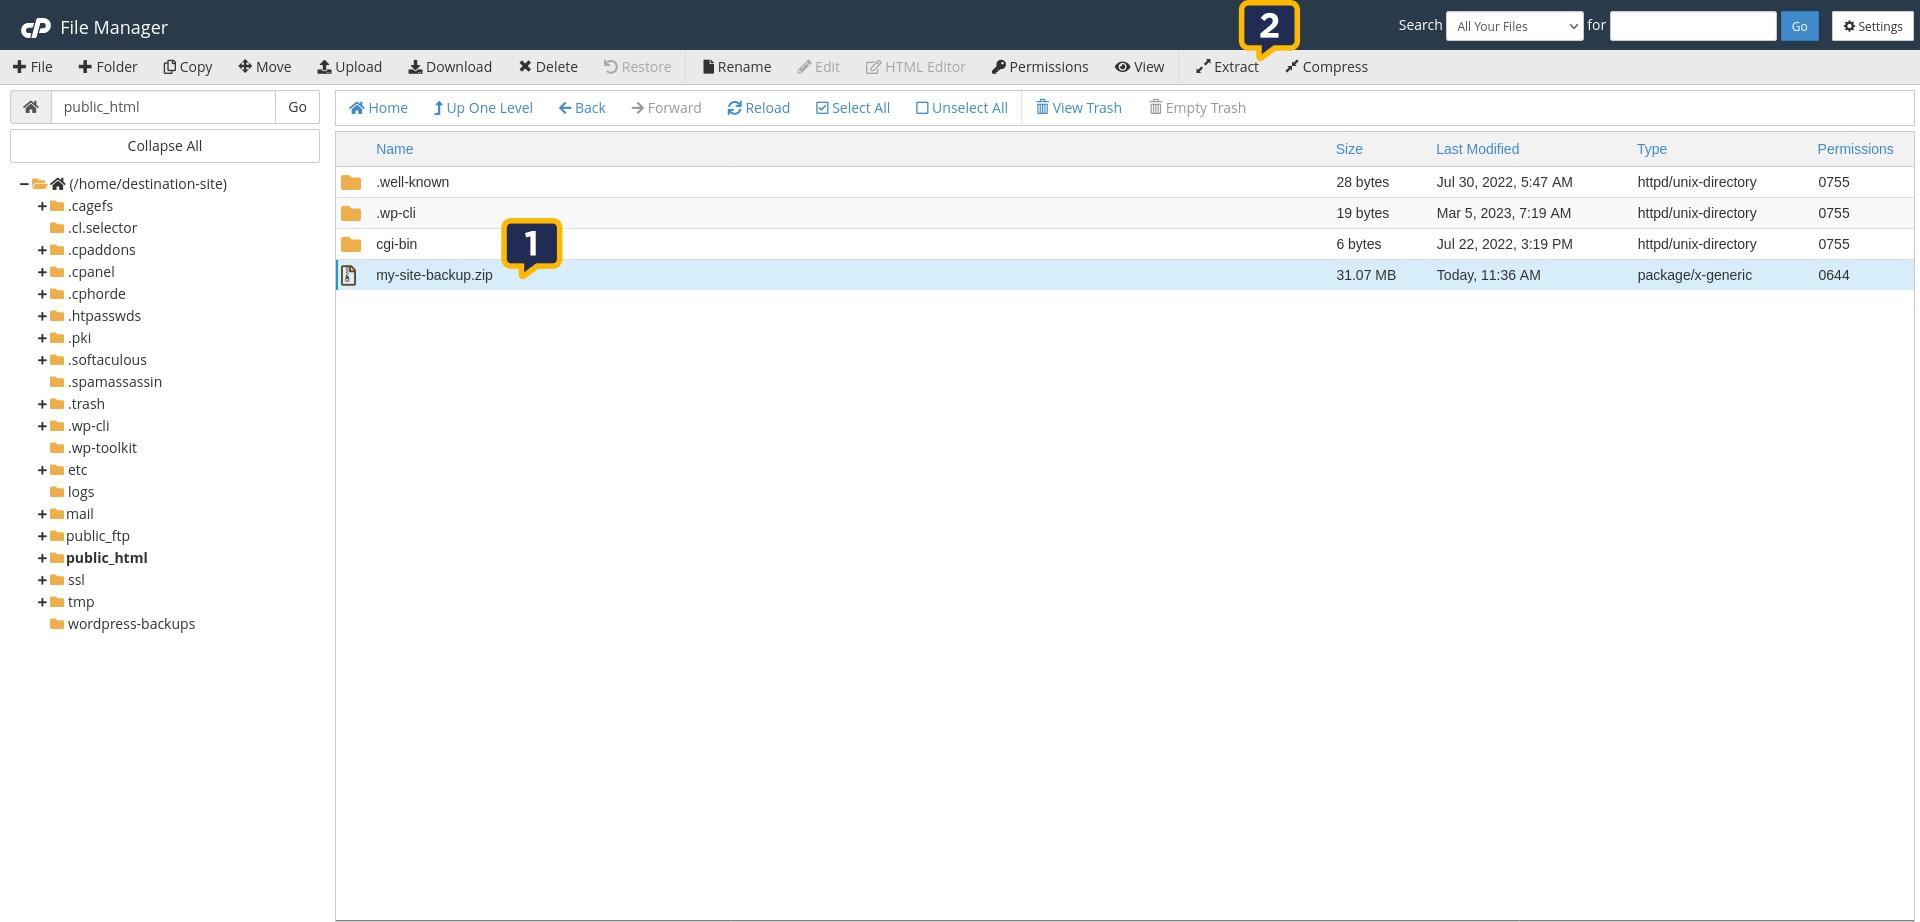
Once you’re complete, return to the File Manager, go to your public_html folder, and refresh the page.
You should now see your uploaded ZIP file, and perhaps a few other folders. (Chances are those are native cPanel folders, so leave them as is.) Click on your uploaded file, and then choose Extract from the top horizontal menu.
Once the extraction process is complete, you’ll have all your site files in your public_html folder.
| Important: At this point you can and should delete the uploaded ZIP file from public_html for security reasons. Do not leave your site archive or any future backups in public_html since these files can be accessed directly from the internet. |
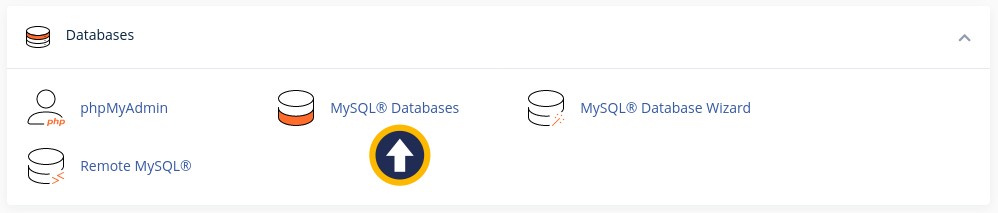
Next, if your host has already created a database for you, feel free to skip this step. Otherwise, open MySQL Databases from the cPanel dashboard on your new host’s servers.
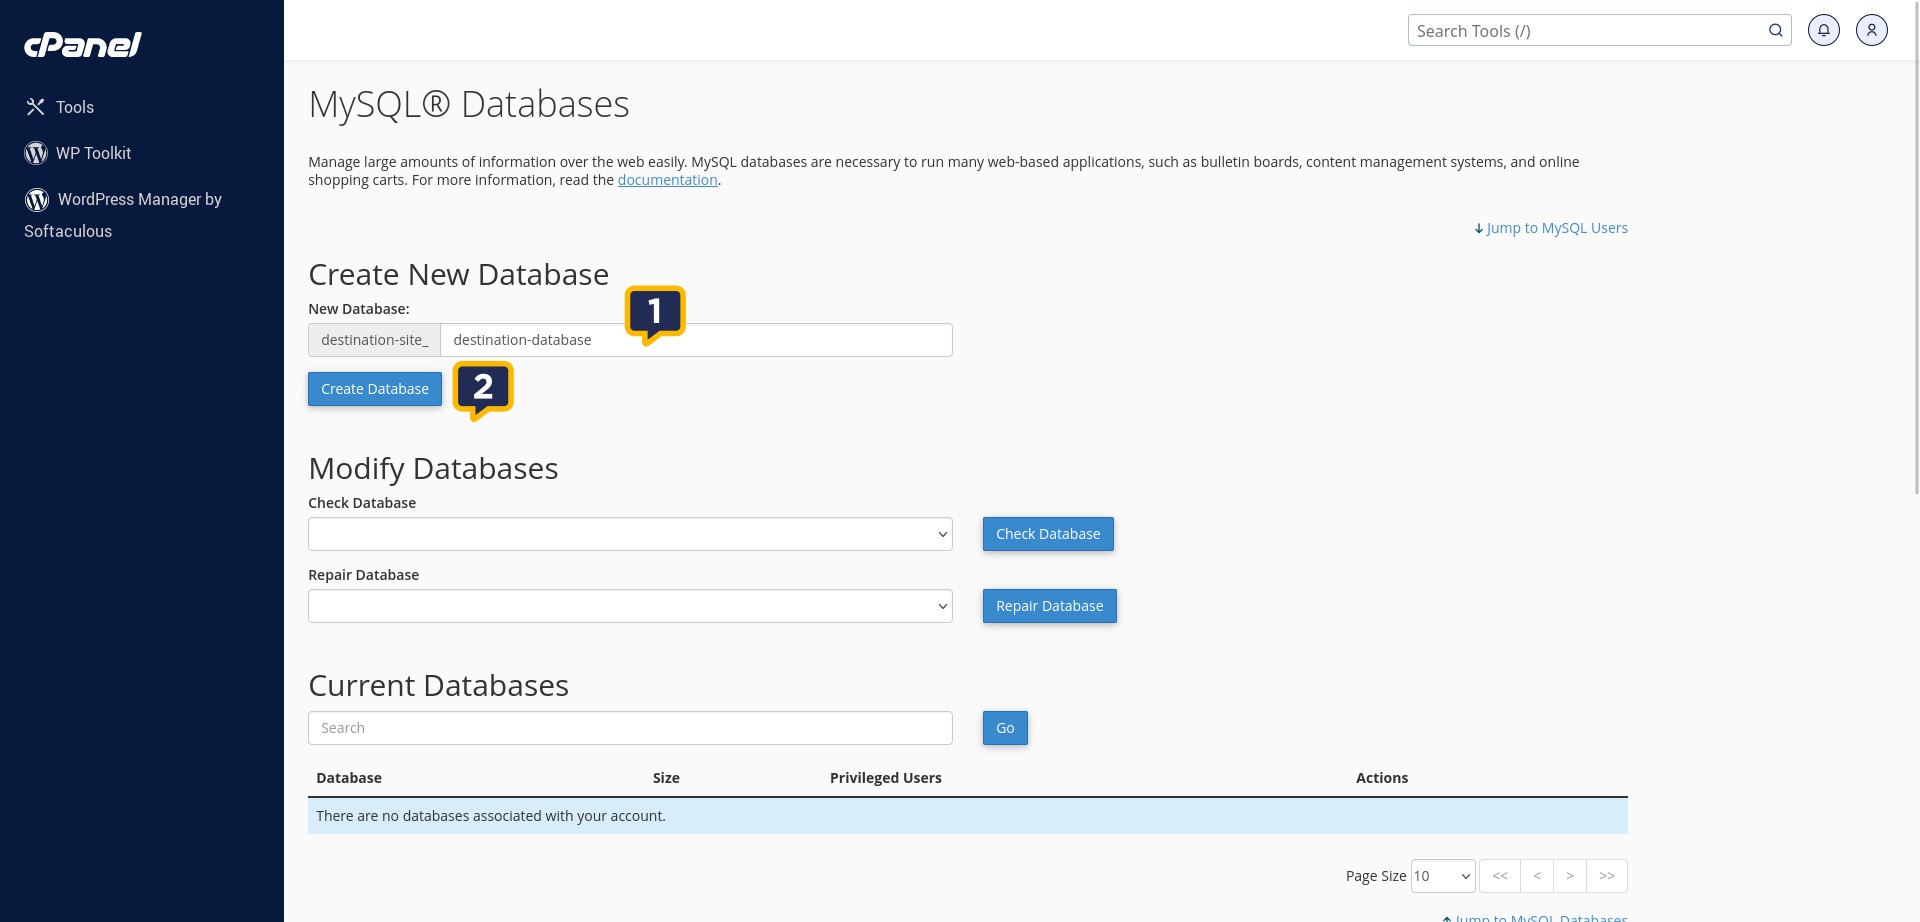
Enter a name for your database. Since you have an existing website that already refers to a specific database, it is strongly recommended to use the exact same database name.
| Note: If you have a WordPress website, the database credentials can be found in wp-config.php which should be located in the compressed archive previously created and downloaded. |
Click Create Database to create the database.
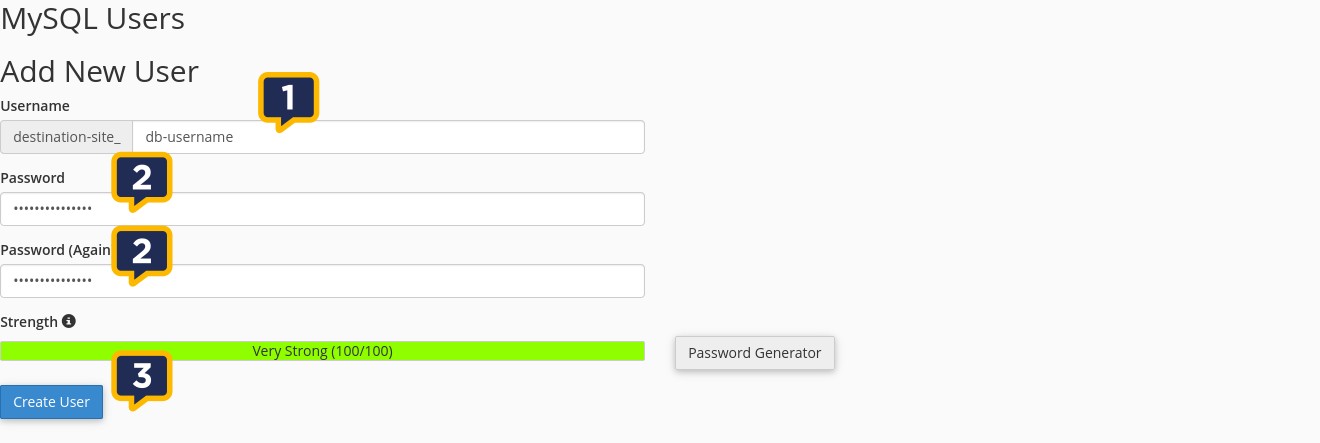
Next, locate the section called MySQL Users and enter a username and password for your database user. Again, since you have an existing website, it’s strongly recommended to enter your database user’s existing username and password.
Finally, in the section Add User to Database, choose your database user and then the database name, then click Add to associate the user with the database. In the subsequent privileges screen, check the top most option to assign ALL privileges to your database user.

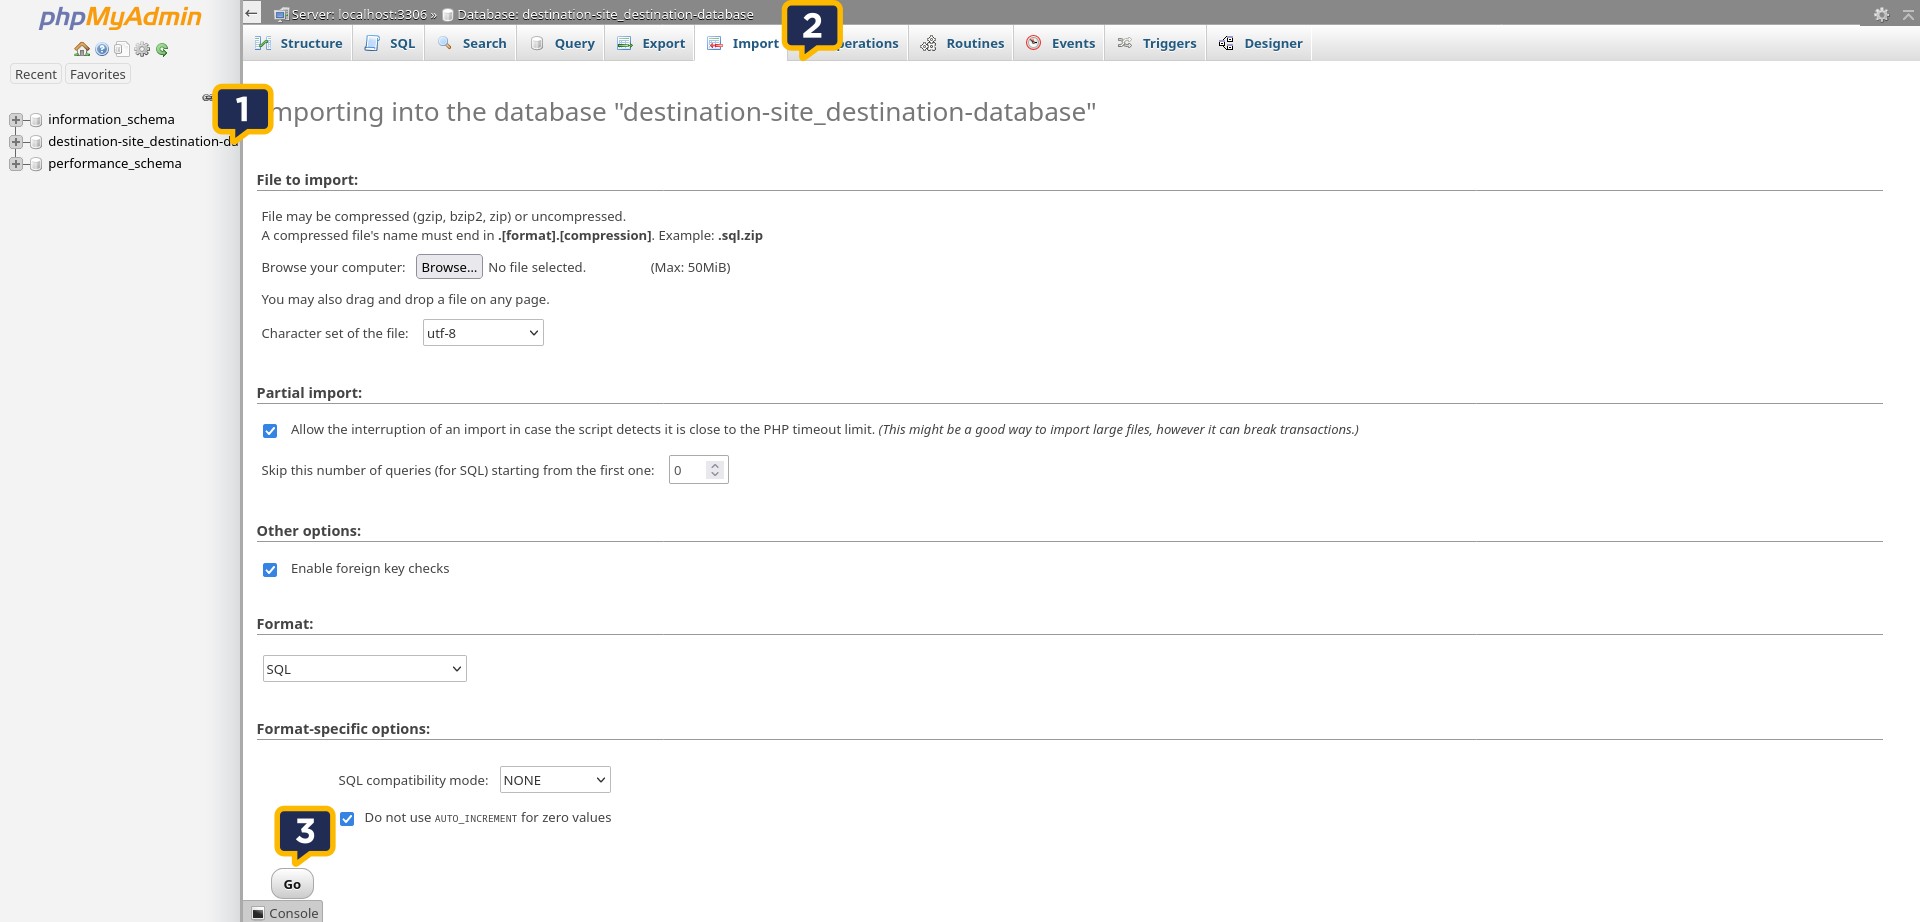
Now that we have a database and user, our next step is to import the database we exported from your current host onto your new host’s server. Open up phpMyAdmin from your new host’s cPanel dashboard.
In phpMyAdmin, click on your database name in the left-hand pane, and then select Import from the top horizontal menu. Click on the Browse button and locate then select your downloaded database file. Click Go at the bottom of the page.
Final Steps
In most cases your site will now be operational on your new host’s server. But how will you know if everything is working? Website testing is an integral part of the migration process, and shouldn’t be underestimated. It could be that your new host doesn’t provide a specific module required by one or more plugins or themes that may only be discovered when a certain site component is used.
If your site checks out, it’s time to change your DNS settings to reflect your new host. Given that DNS configurations can vary from one site to another, this step won’t be covered here. It is, instead, strongly recommended that you ask your new host’s support team to make the required changes for you.
More related news
Cloud Hosting
Cloud Server vs VPS: What’s the Difference and Which Is Better for Your Business?
If you’re running a SaaS platform, digital agency, ecommerce store, education portal,...
Developers
Low-code + custom: when to use low-code tools in your SaaS stack (and when not to)
Low-code has become a practical part of many SaaS stacks – because...
Speak with a Storm Expert
Please leave us your details and we'll be in touch shortly
A Trusted Partner